Post by Hoovie on Feb 8, 2018 12:13:04 GMT
by Serratia
Tue Nov 18, 2014 8:48 pm
Disclaimer: I accept no responsibility for any damage done to persons or vehicles throught following this guide. All work is carried out at the owners risk.
Note: This is for the RAV4.2 (2000-2005) - later RAV4s will likely have a different procedure.
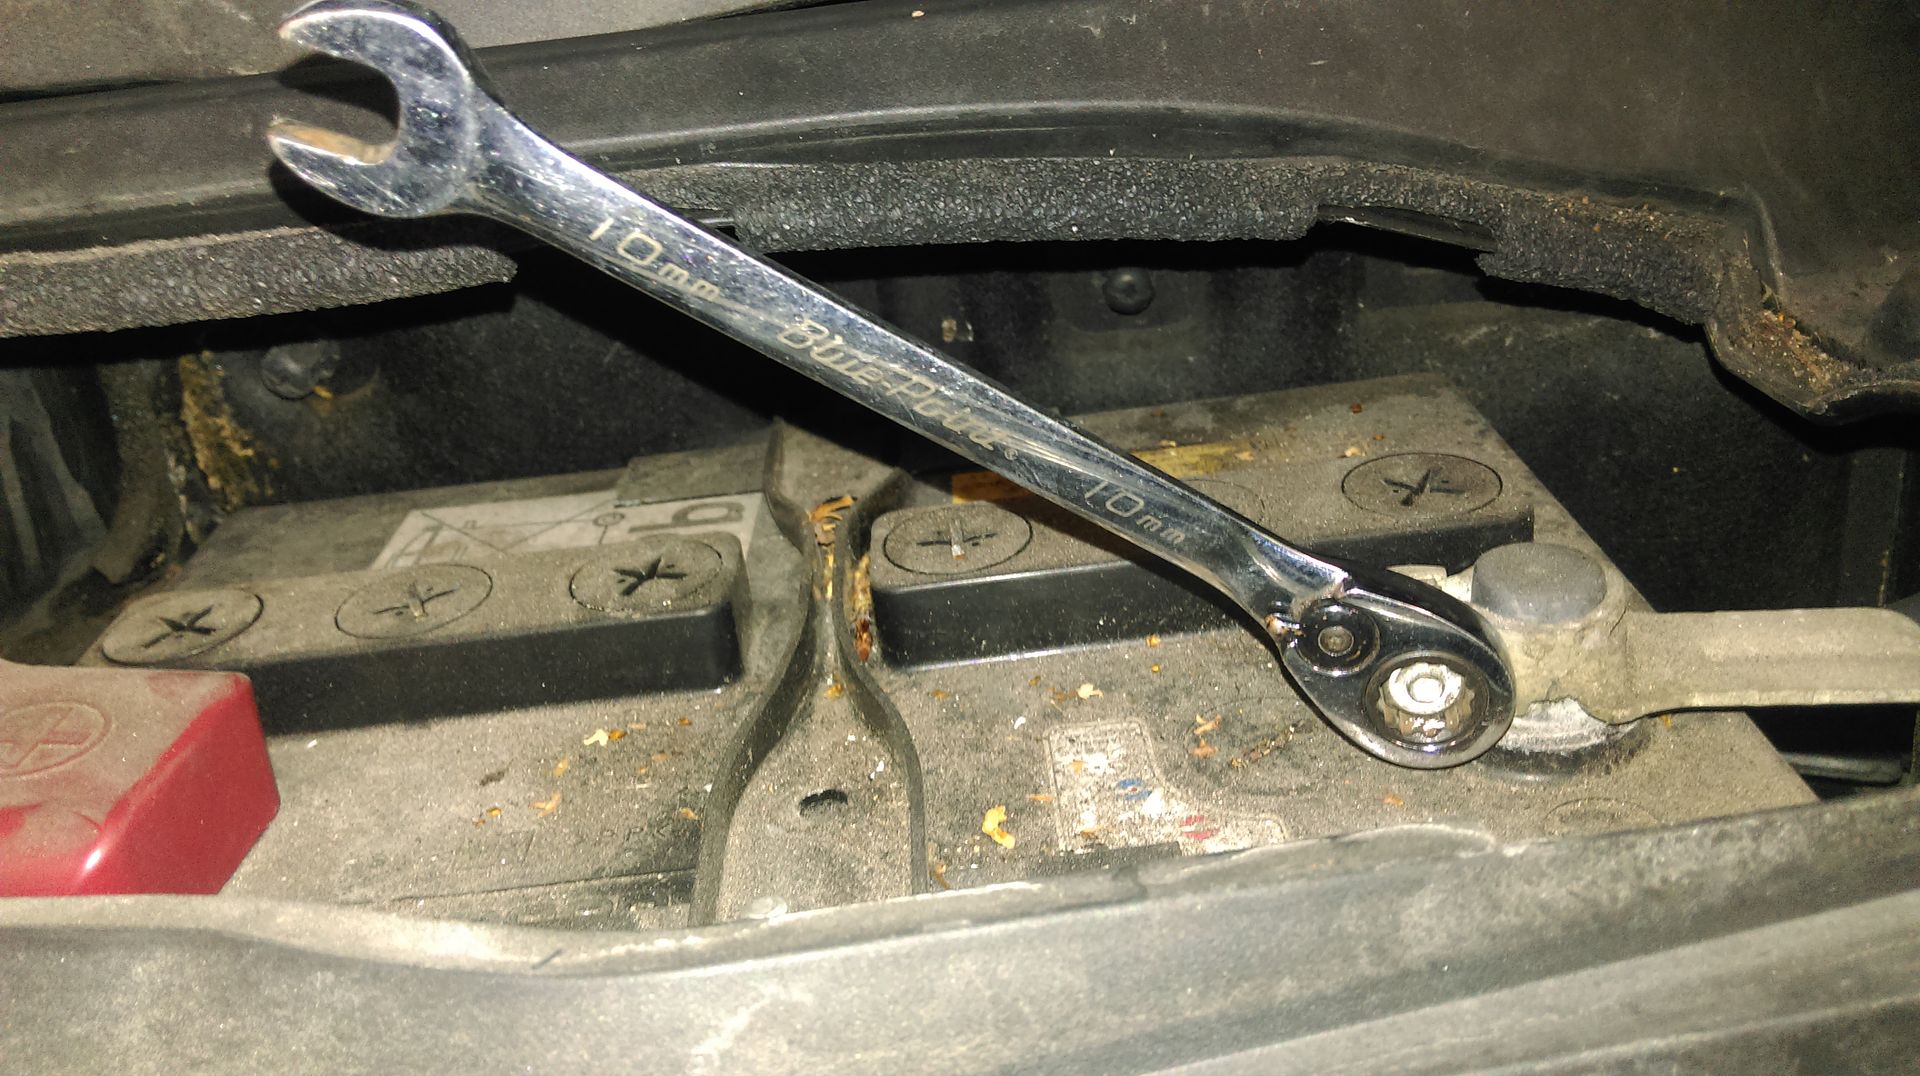
1. Pop the bonnet, remove the battery cover and disconnect the battery negative terminal using a 10mm spanner.
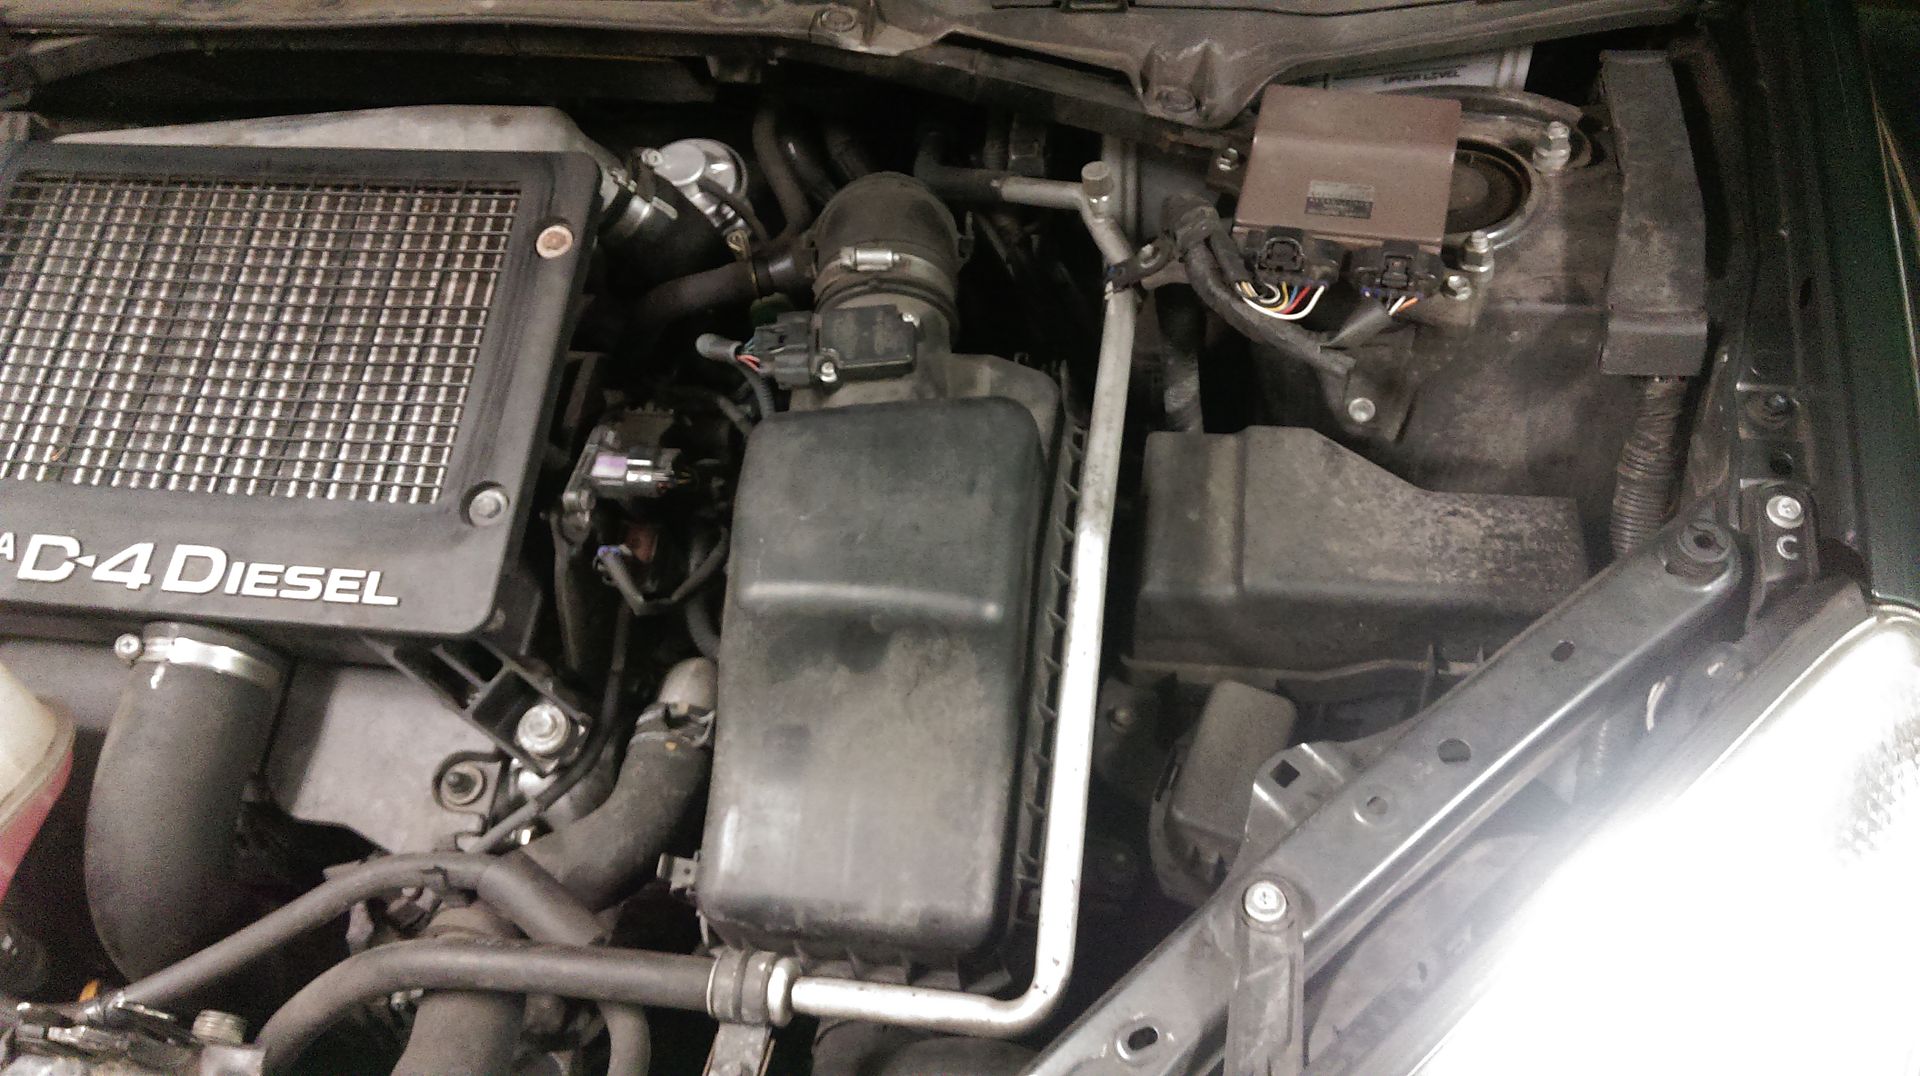
2. Locate the airbox (big black rectangular jobbie in the pic below):
3. Undo these two catches either side of the lid, disconnect the MAF sensor and then I undo the 10mm jubilee clip holding the air intake pipe in place. Remove the pipe from the airbox lid.
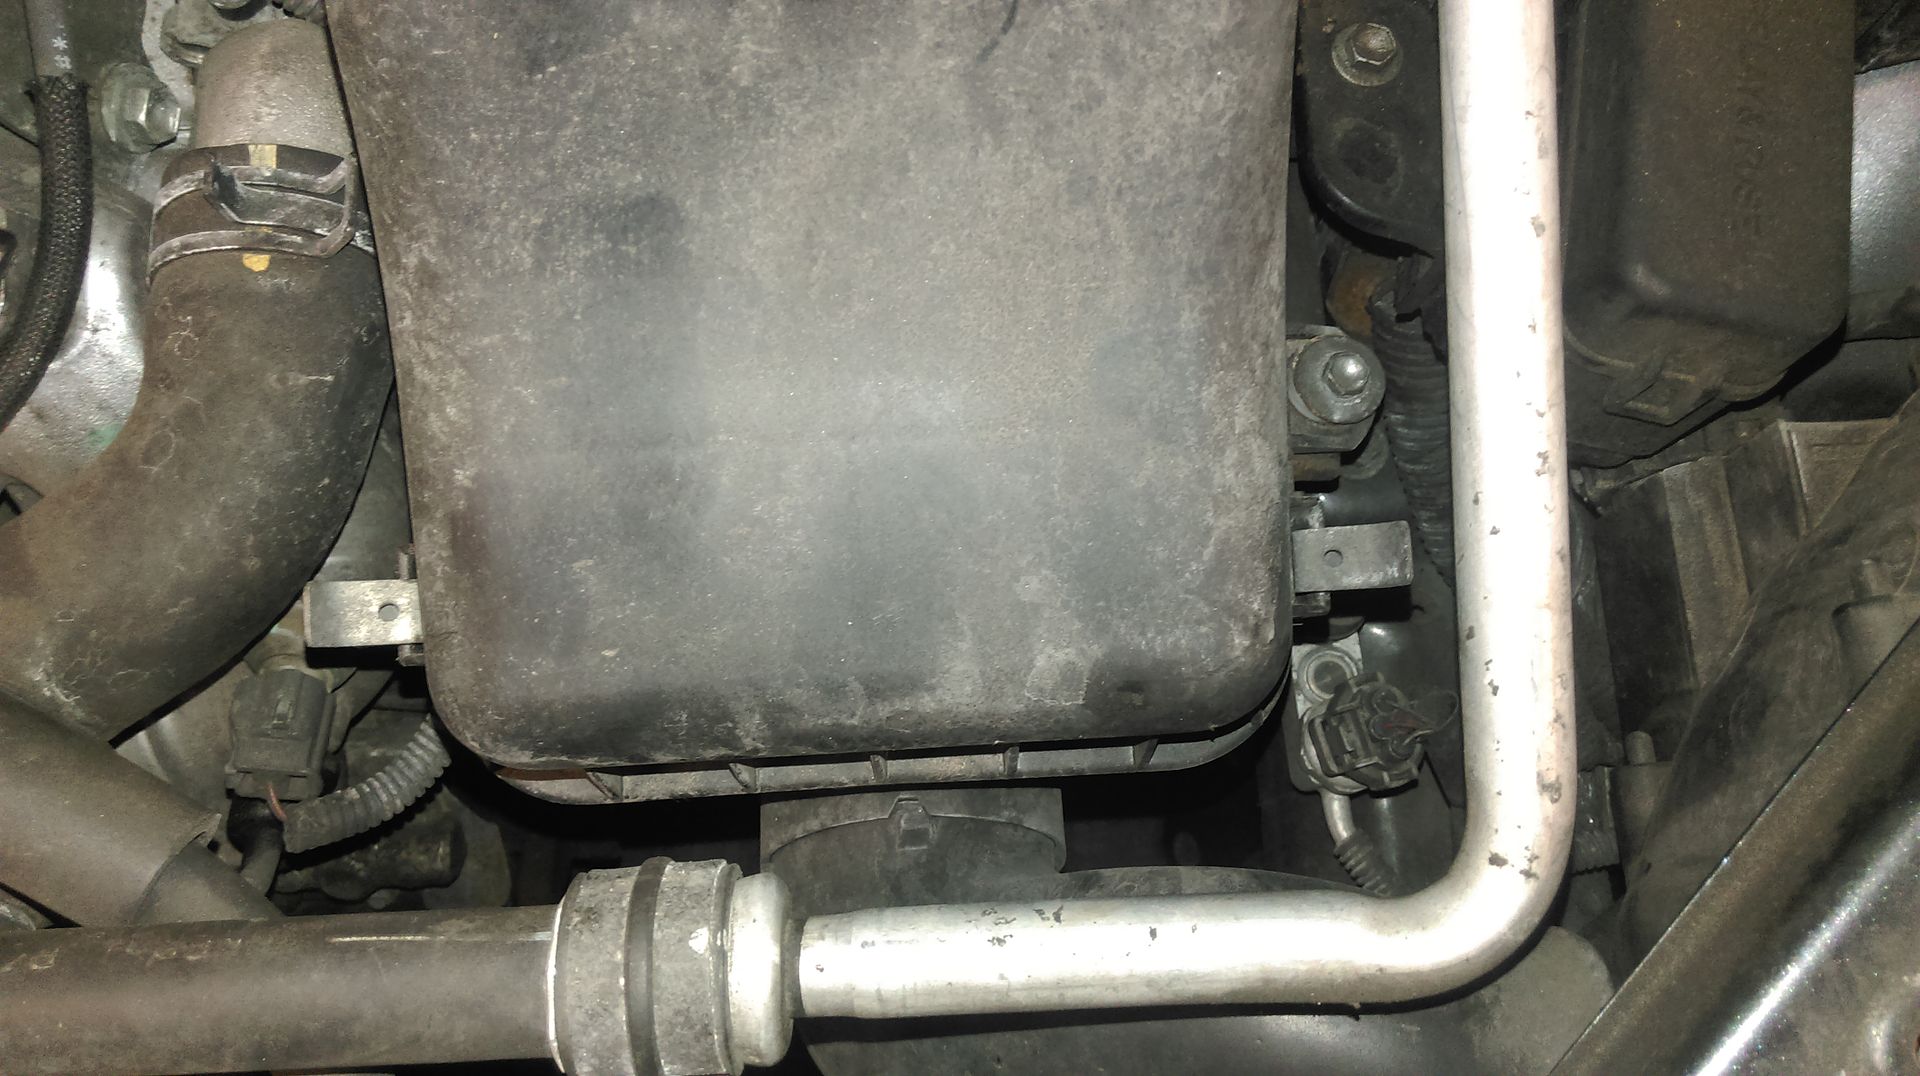
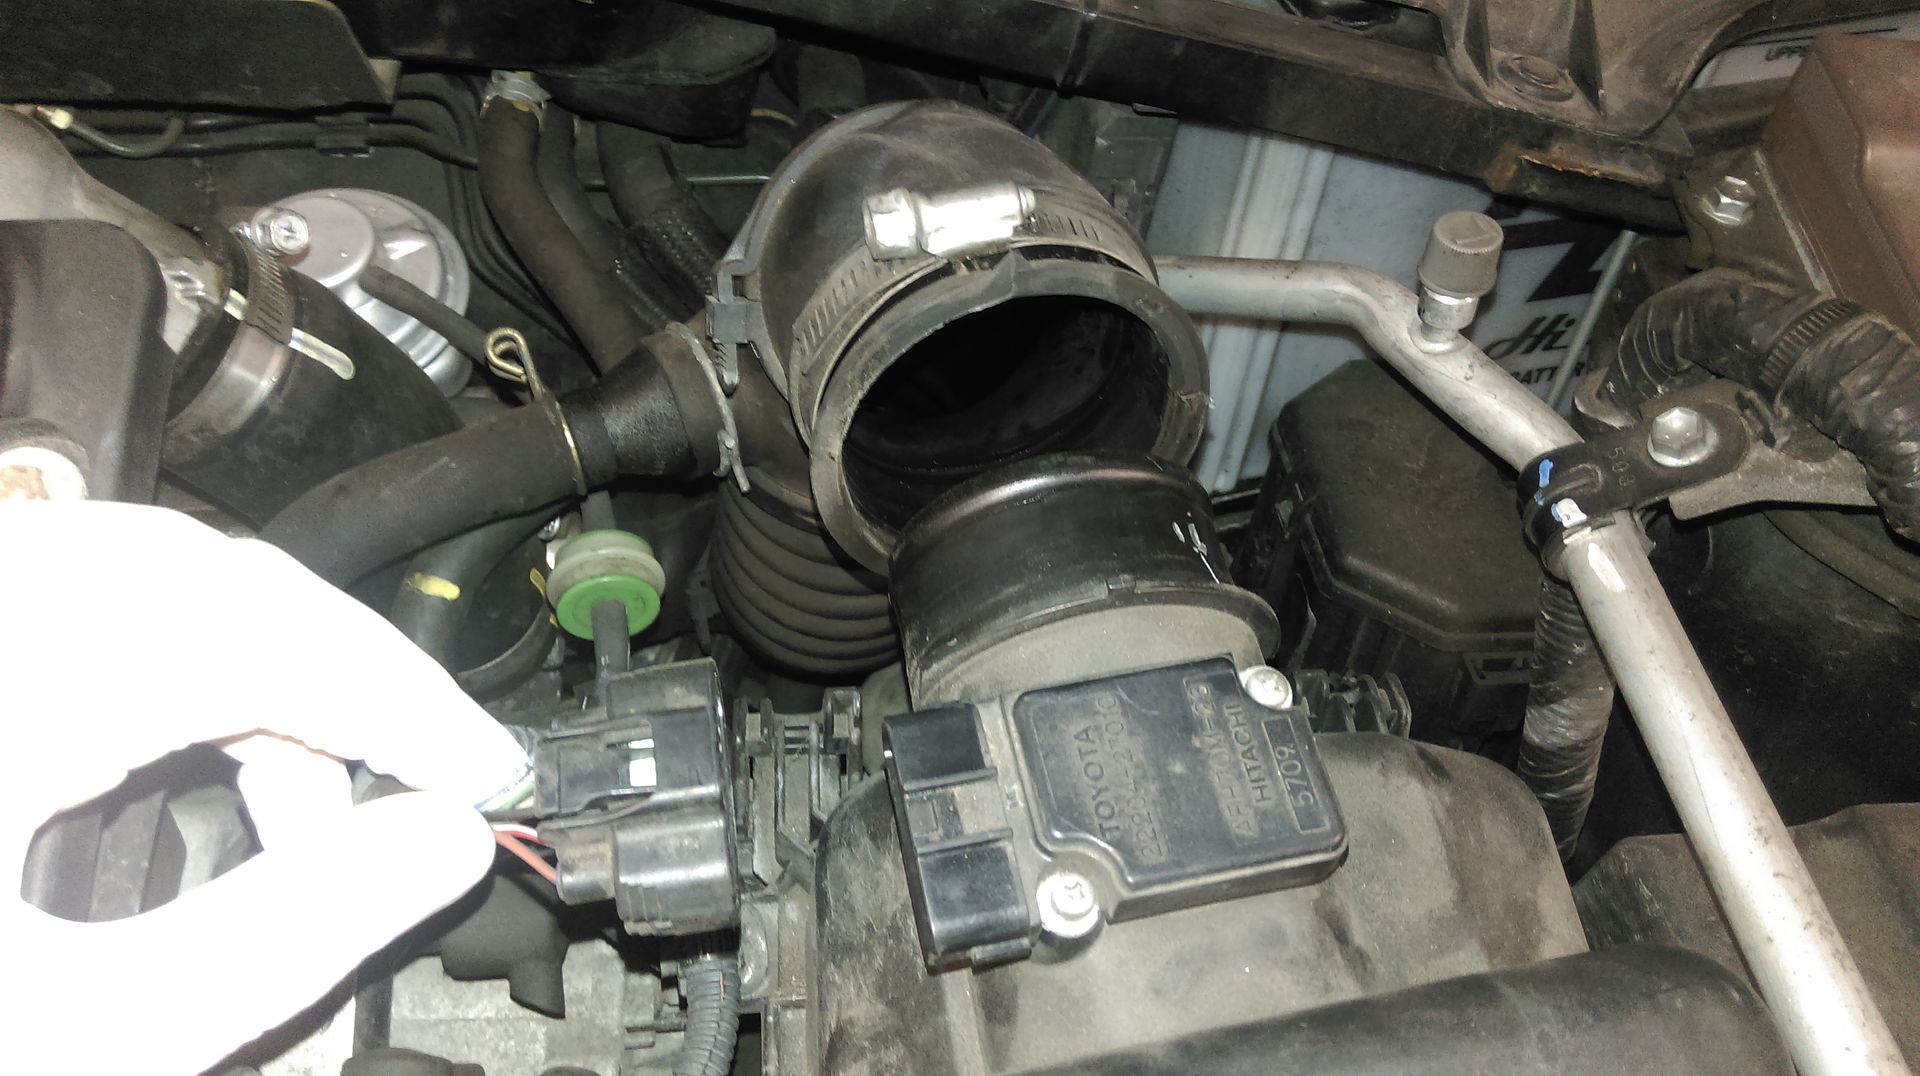
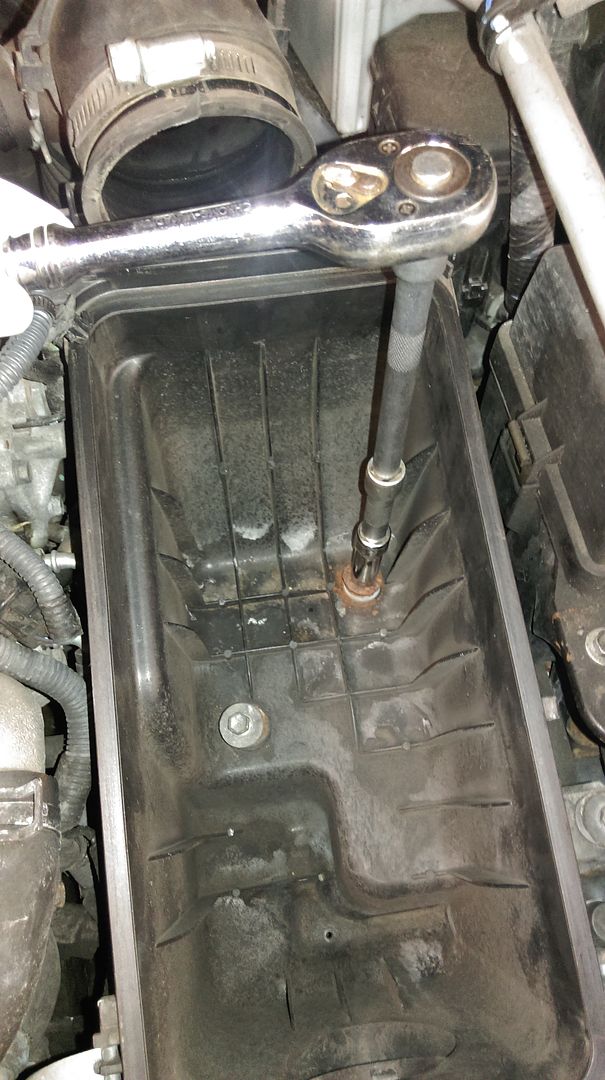
4. Remove the airbox by lifting it up and pulling it towards you. Remove the air filter. Now remove the three 10mm bolts holding the bottom of the airbox in place then remove the airbox:
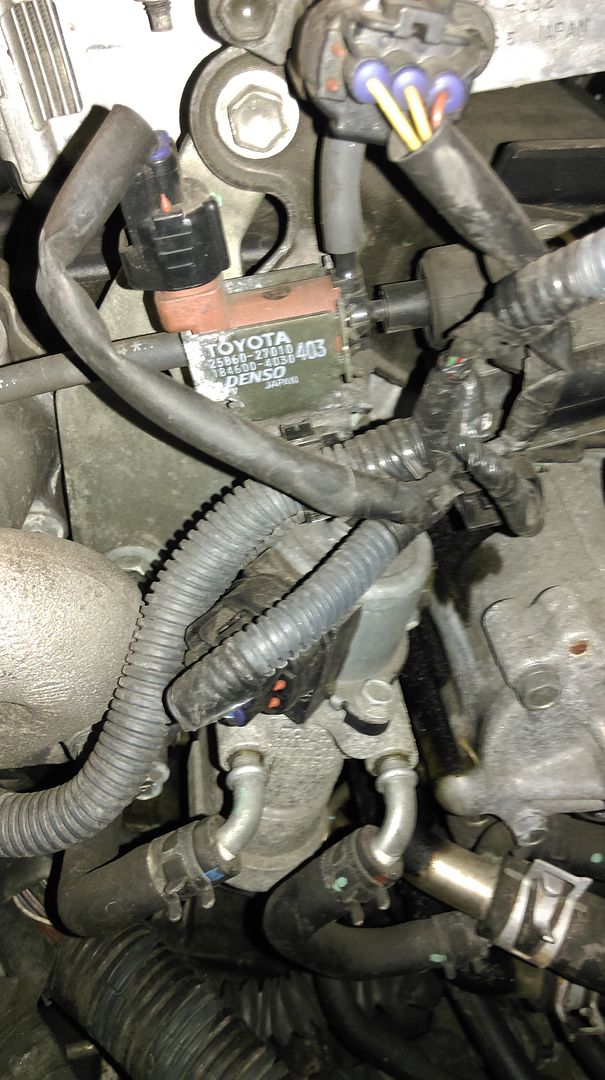
5. You can now see the EGR valve to the left of where the airbox was. It's easy to spot as it has a black multi plug on the top and two small coolant pipes attached:
6. Undo the multiplug, and slacken off the two 12mm nuts on the top sides and the single bottom 12mm bolt.
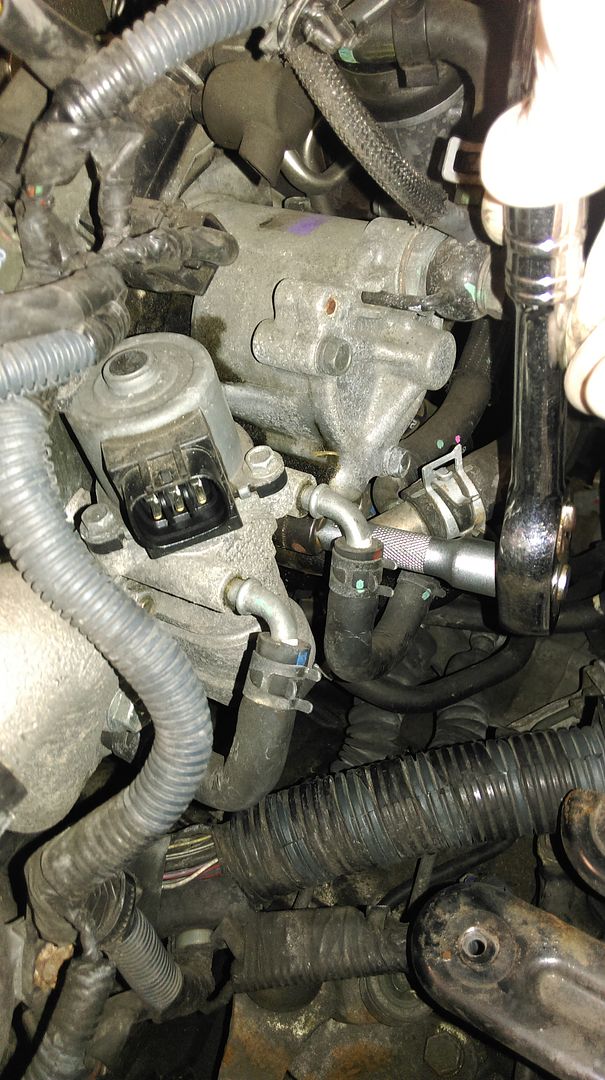
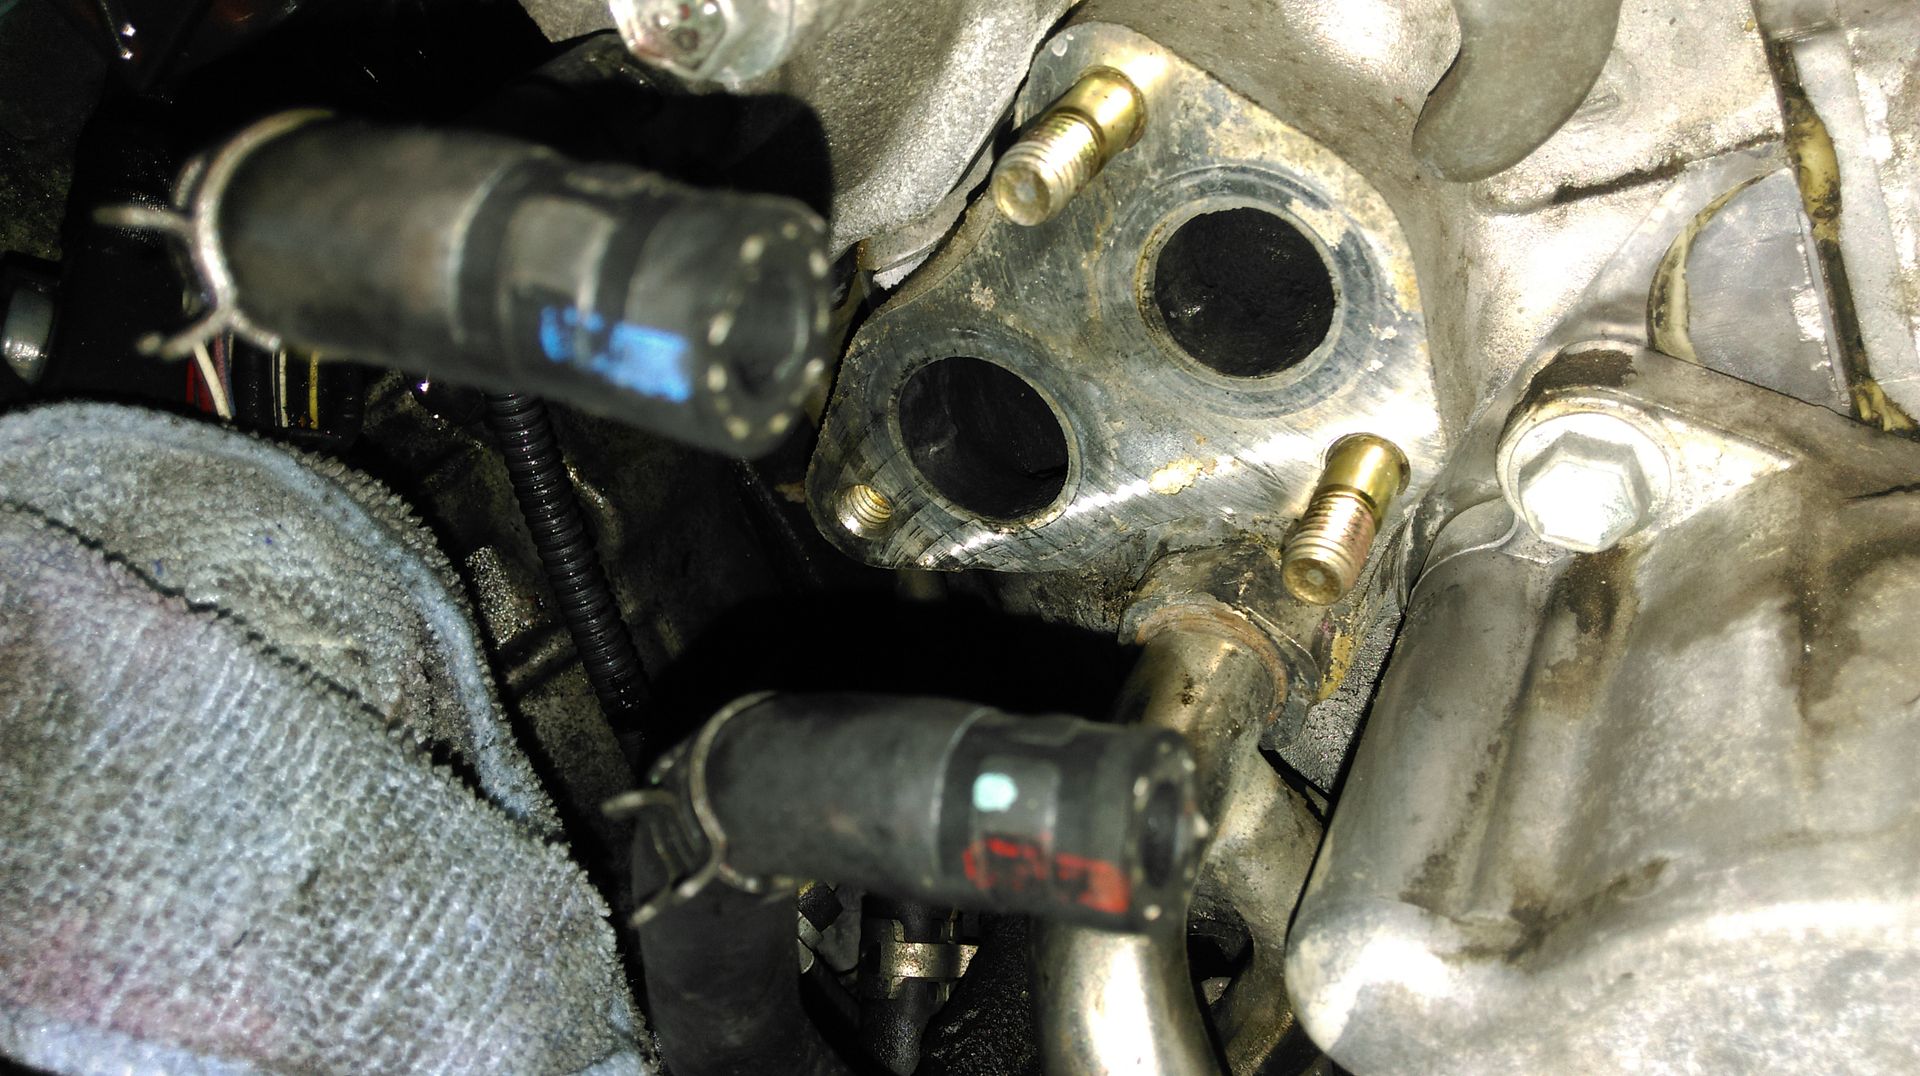
7. Squeeze the clips on the two coolant pipes and slide them down the pipes out of the way. You may need to use some pliers. Before pulling off the coolant pipes, have a couple of small 8mm bolts to shove in the pipes to stop too much coolant spurting out. Now pull off the pipes one at time, block the ends with the bolts then remove the 12mm nuts and bolt holding the EGR in place. Remove the EGR but make sure you don't lose the metal gasket that sits behind it. Once cleaned this can be reused.
8.With the EGR on the bench, notice the three 8mm bolts at the top. These will need to be removed so you can manually operate the valve during cleaning. BEFORE removing the bolts, Mark the side of the EGR so you know what orientation to reassemble the two parts.
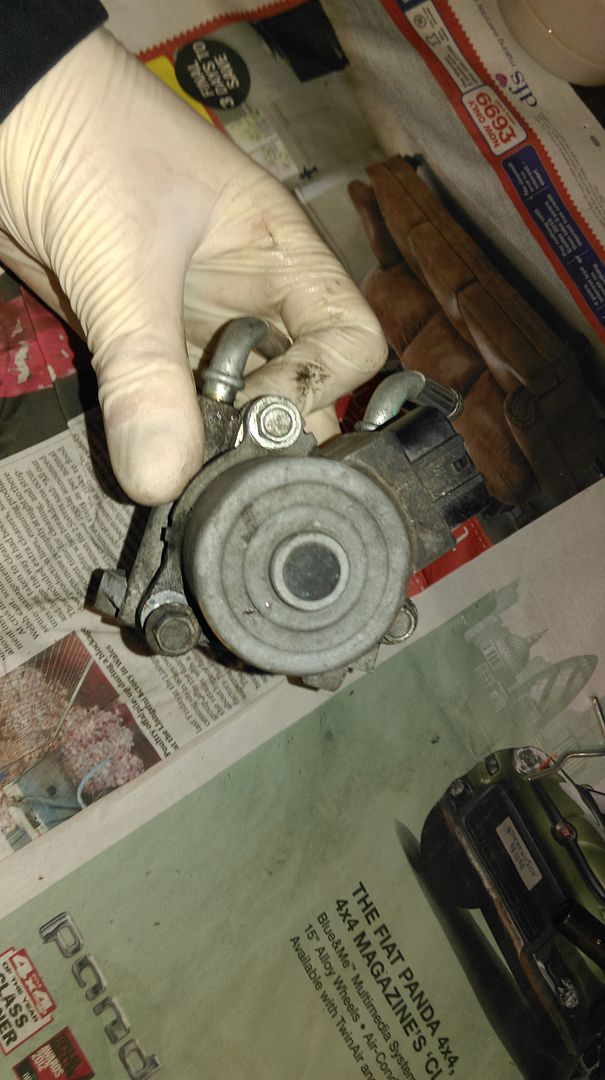
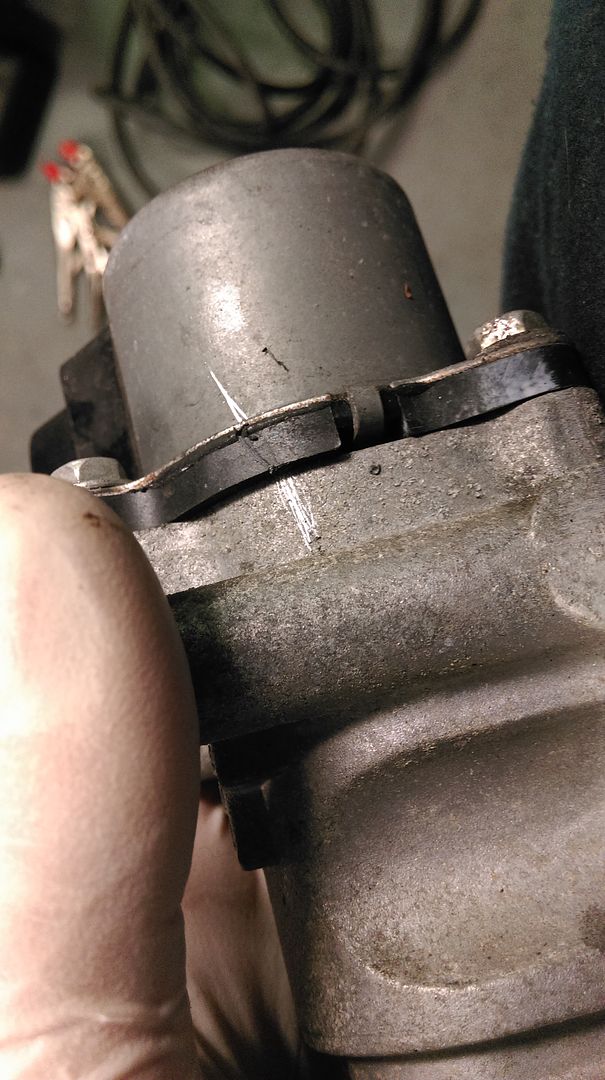
9. It's hard to see in this pic but it was heavily coked up inside.
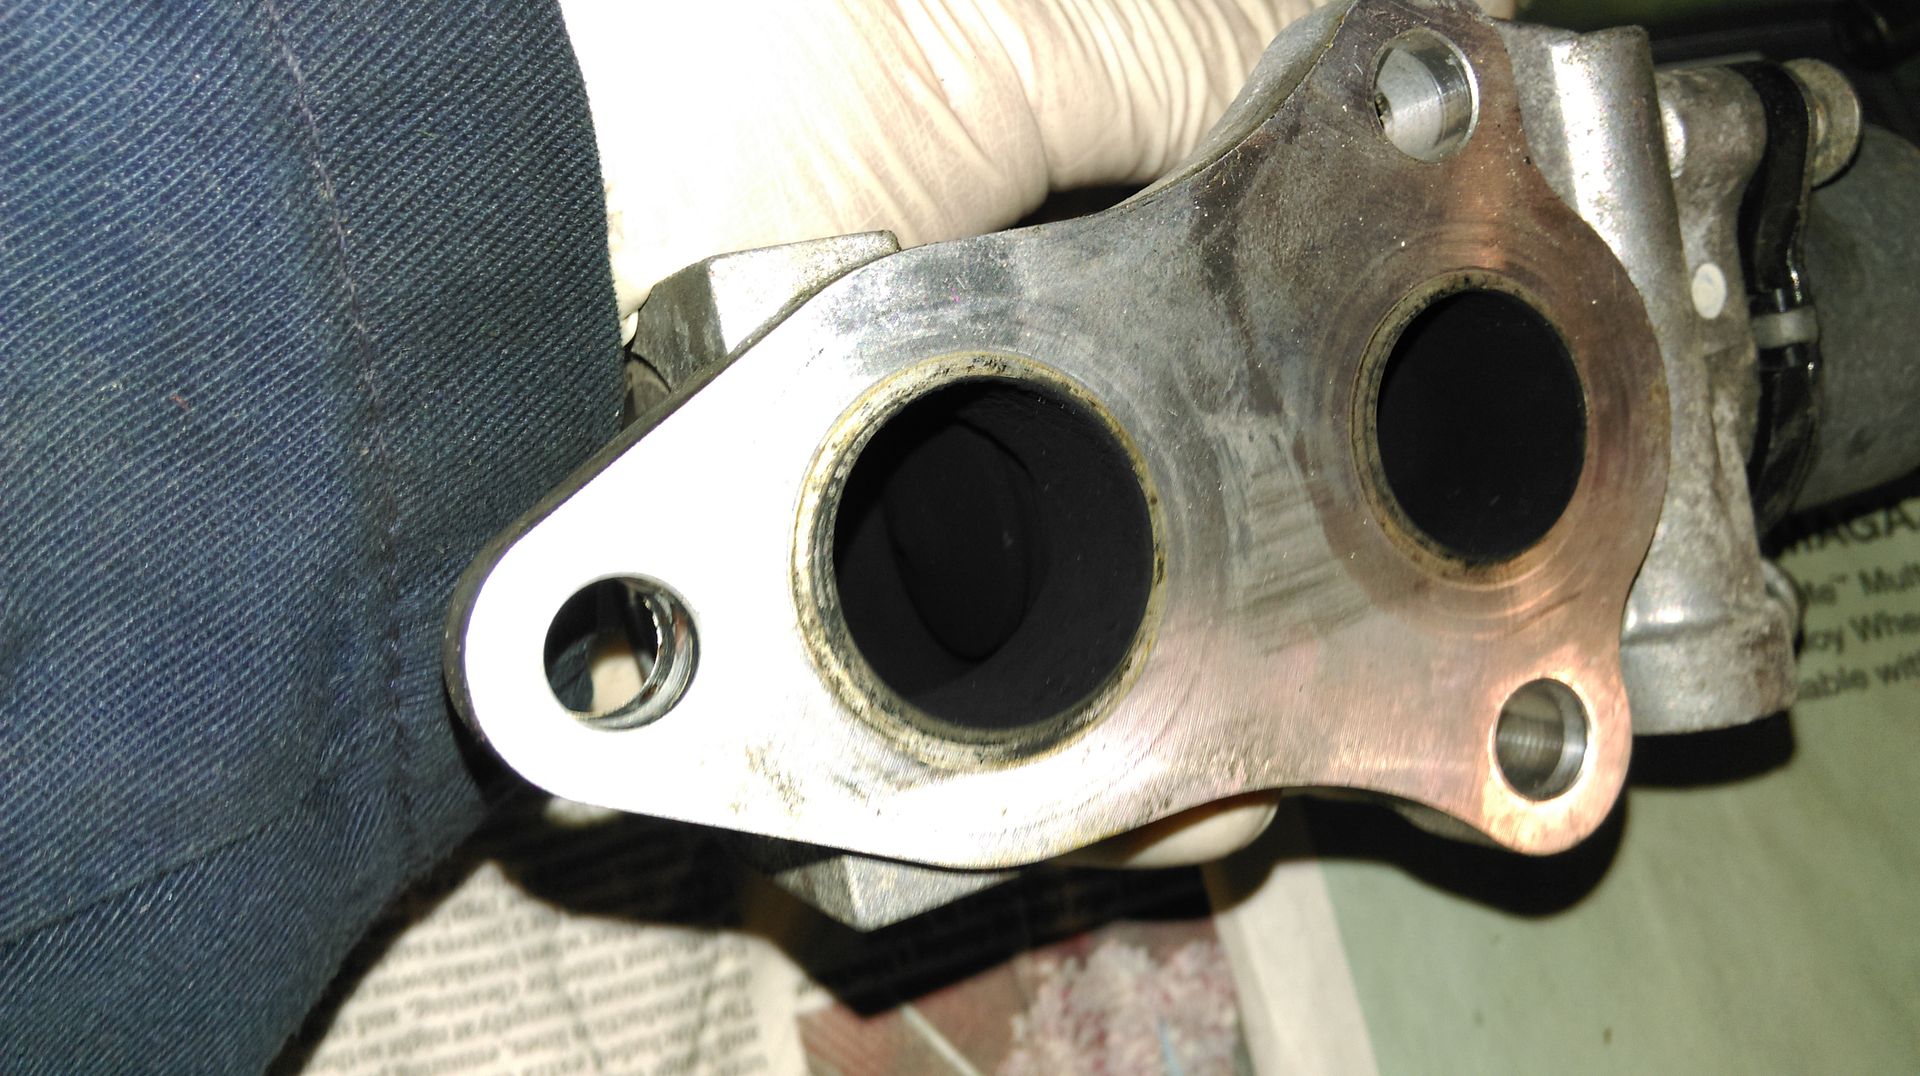
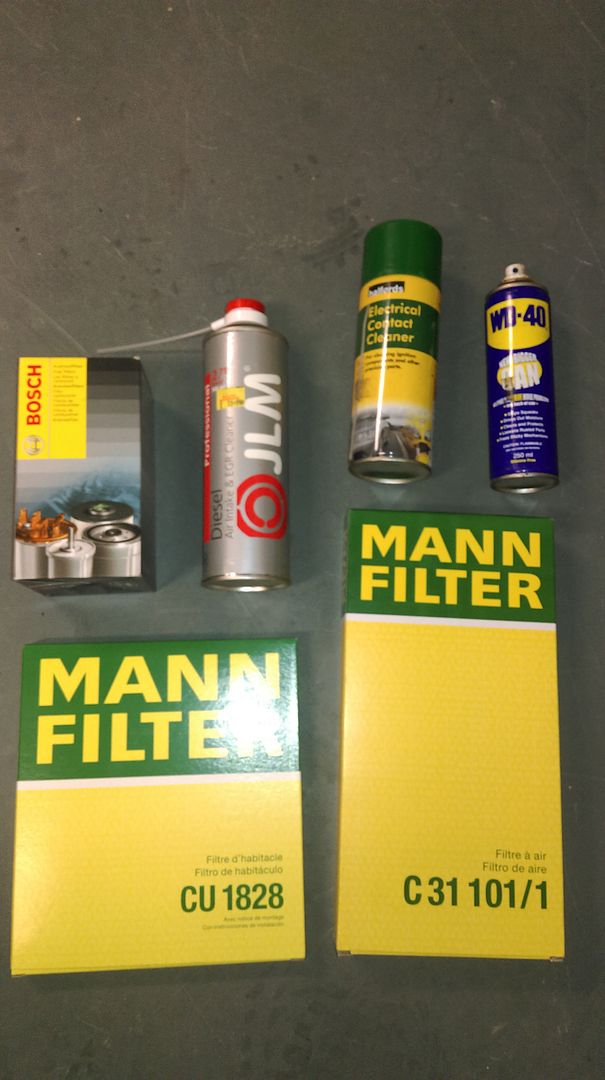
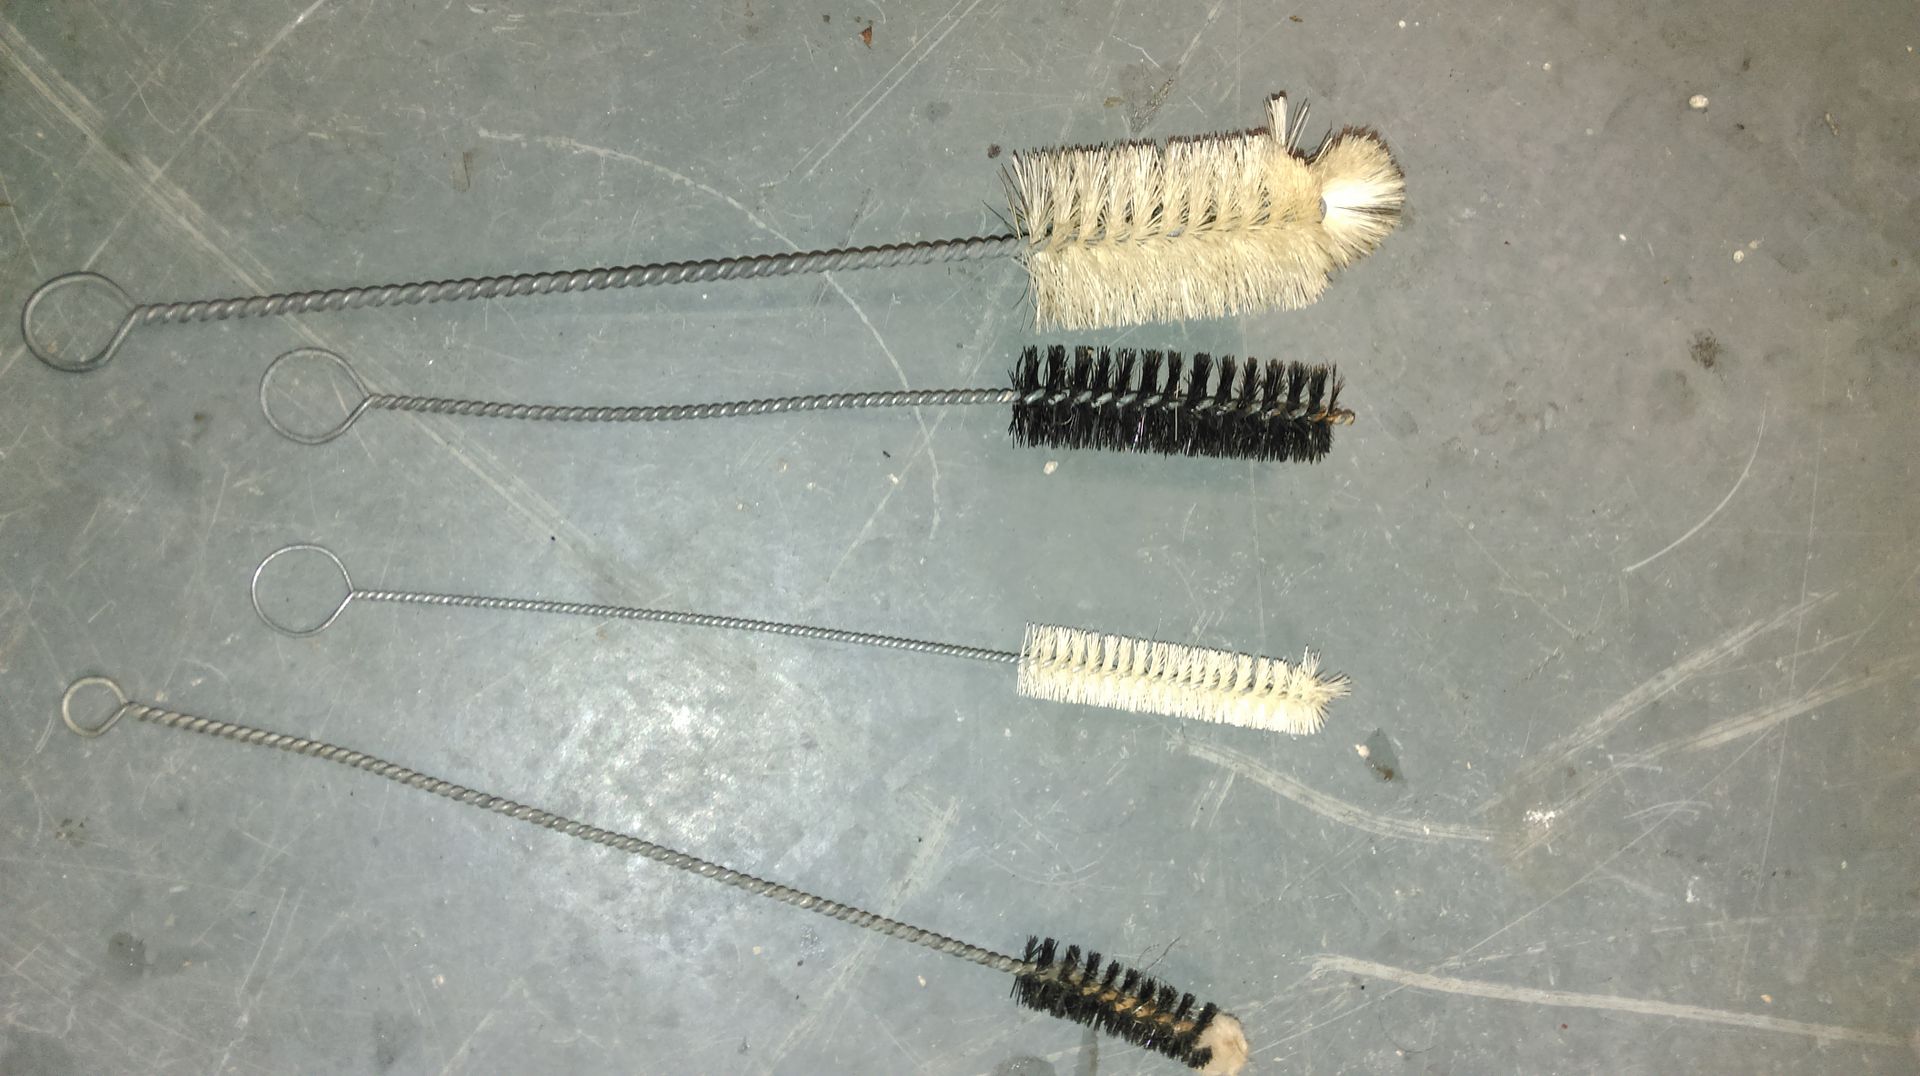
10. Now get to work with some small bottle brushes and a can of EGR cleaner or carb cleaner which is half the price. I decided to use JLM EGR cleaner which is about £11 but does a good job.
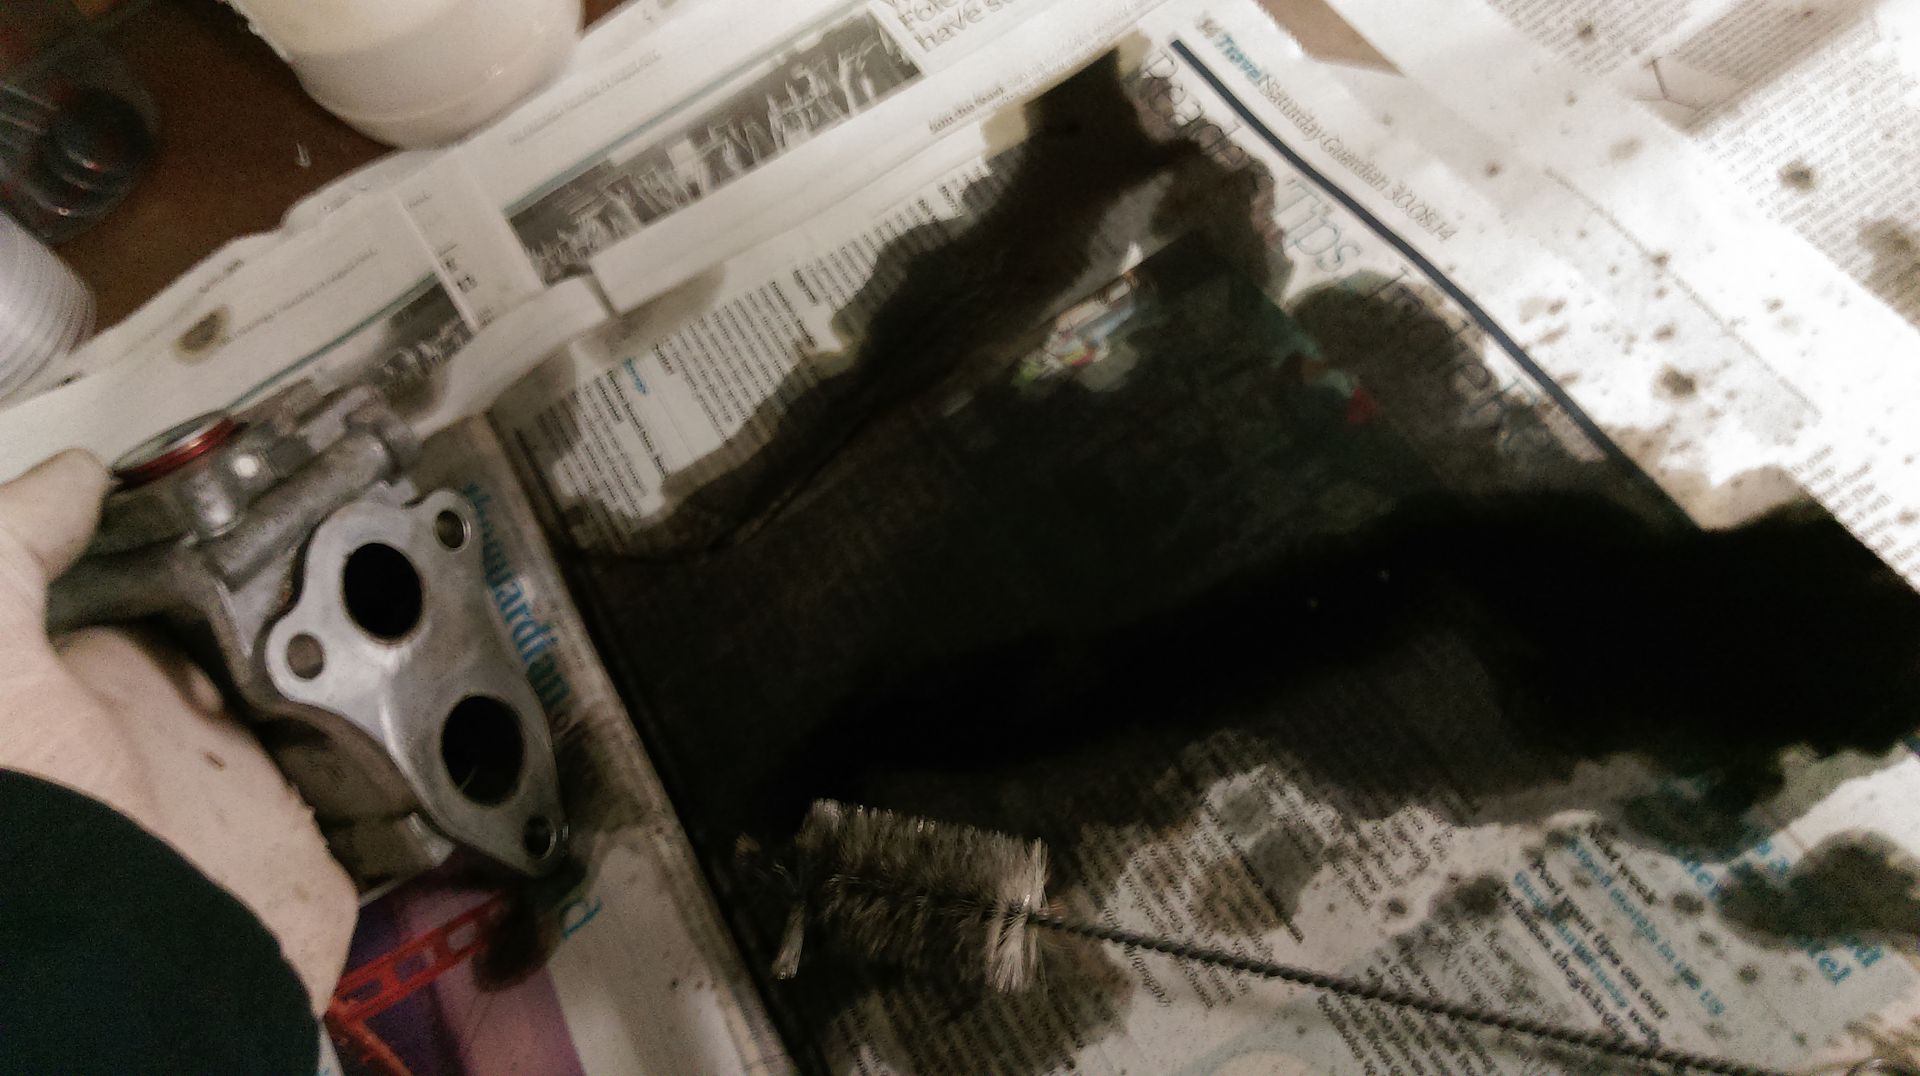
11. Here is a pic of just some of the black carbon sludge that came out during cleaning.
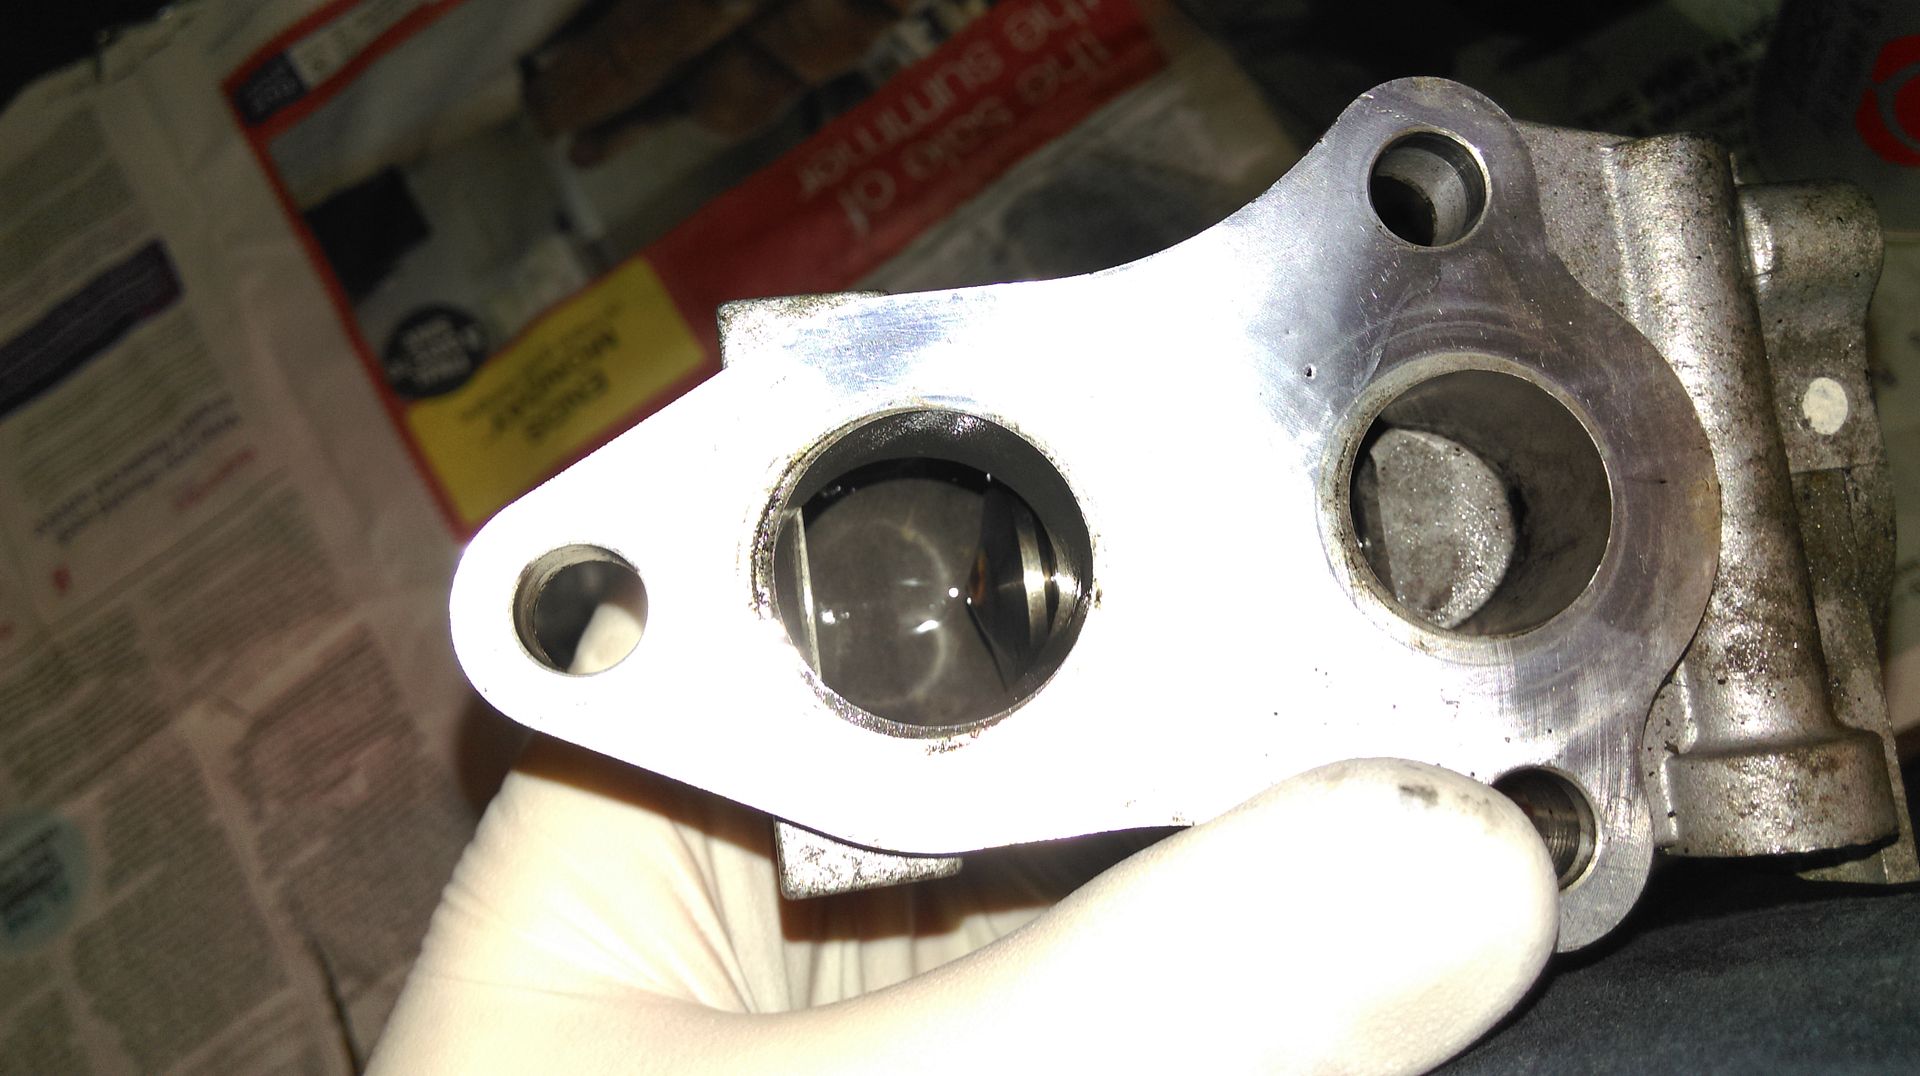
12. Much cleaner after 20 minutes of scrubbing.
13. Give the spring on top of the EGR a spray with WD40 and work the spring up and down to ensure it moves freely. Now reassemble the two parts of the EGR and refit to the engine, don't forget the gasket. Reconnect coolant pipes and the spring clips. Give the EGR multiplug a good spray with electrical contact cleaner and let it air dry, then reconnect.
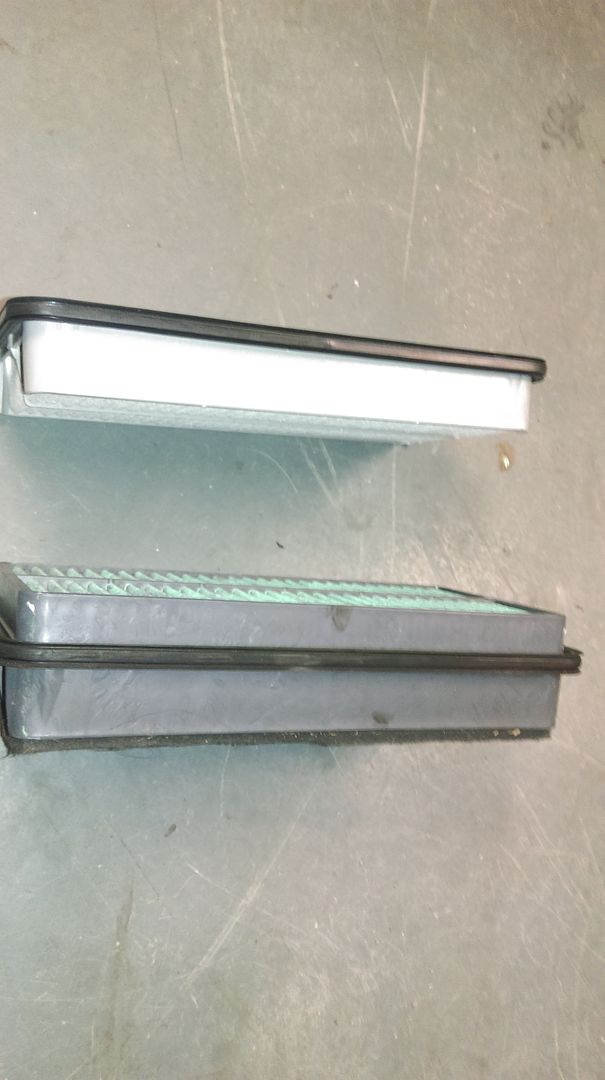
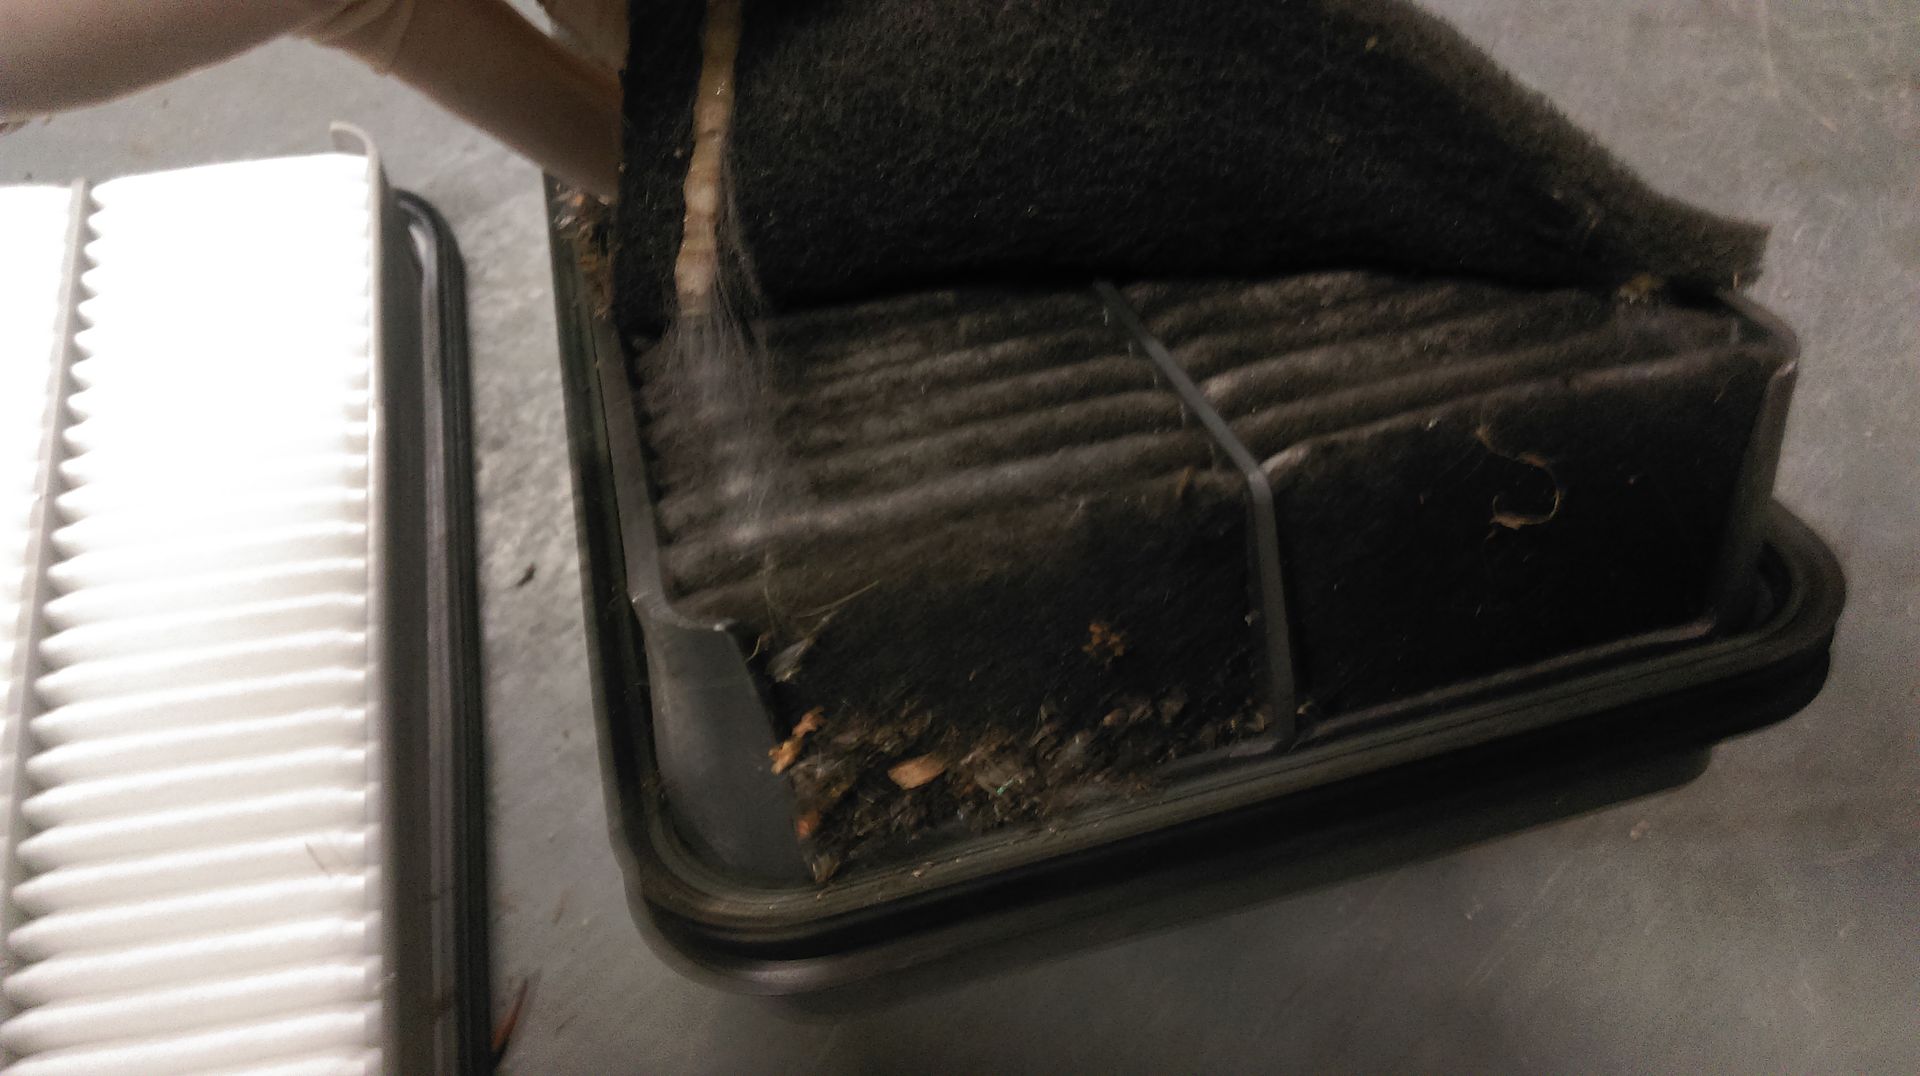
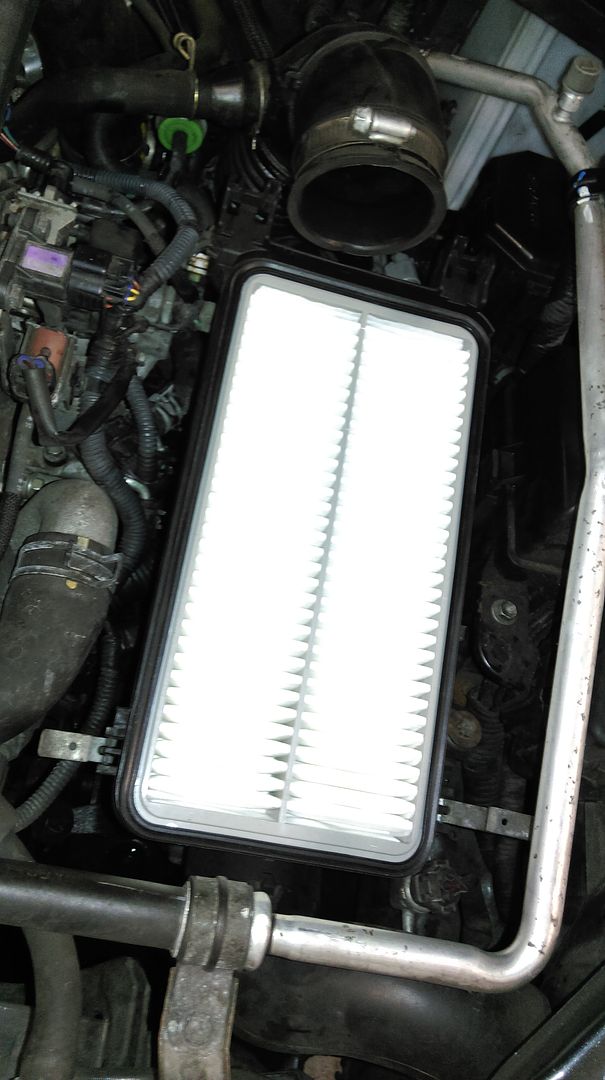
14. Whilst in that area I fit a new air filter as the old one was very dirty. Plus the new one was half as fat which should improve air flow.
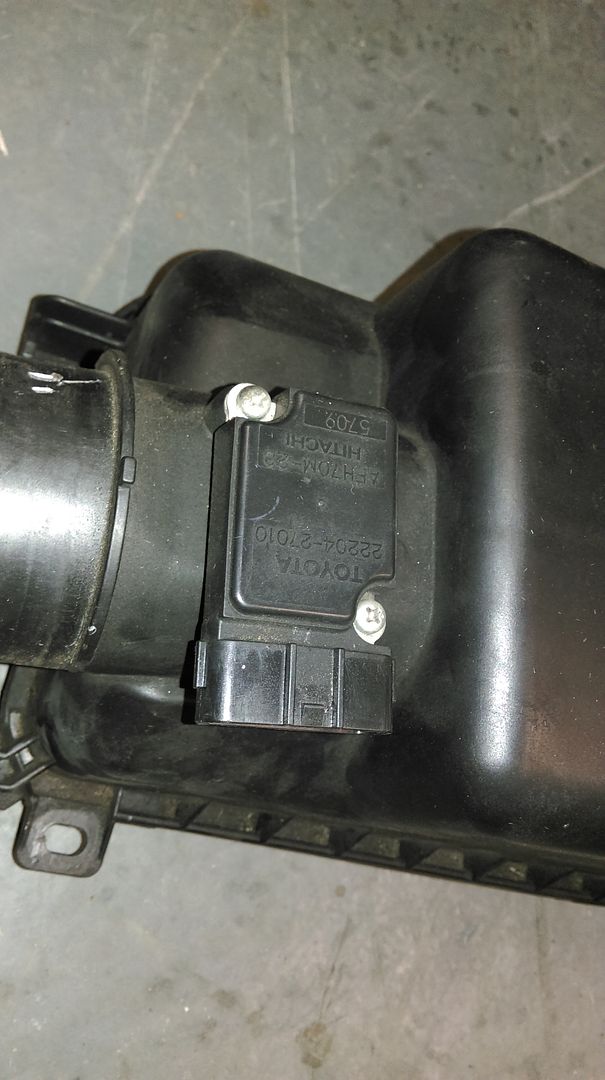
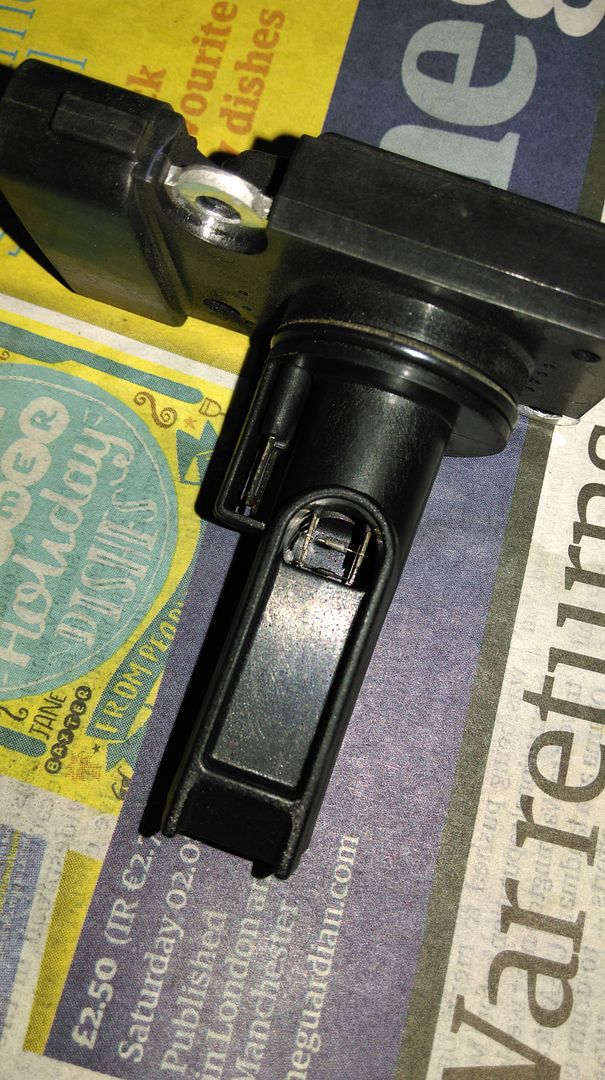
15. I also decided to clean the MAF sensor using electrical contact cleaner. You can see the fine wires in the end of the sensor. Don't be tempted to rub them with anything, just give them a good blast with the spray and let it air dry.
Refit once dry, also give the multiplug a spray and let that air dry before reconnecting everything. I also replaced the fuel filter but there is already a very good guide on here showing how to do that. Last job is to reconnect the battery negative terminal once you have reinstalled everything in reverse order.
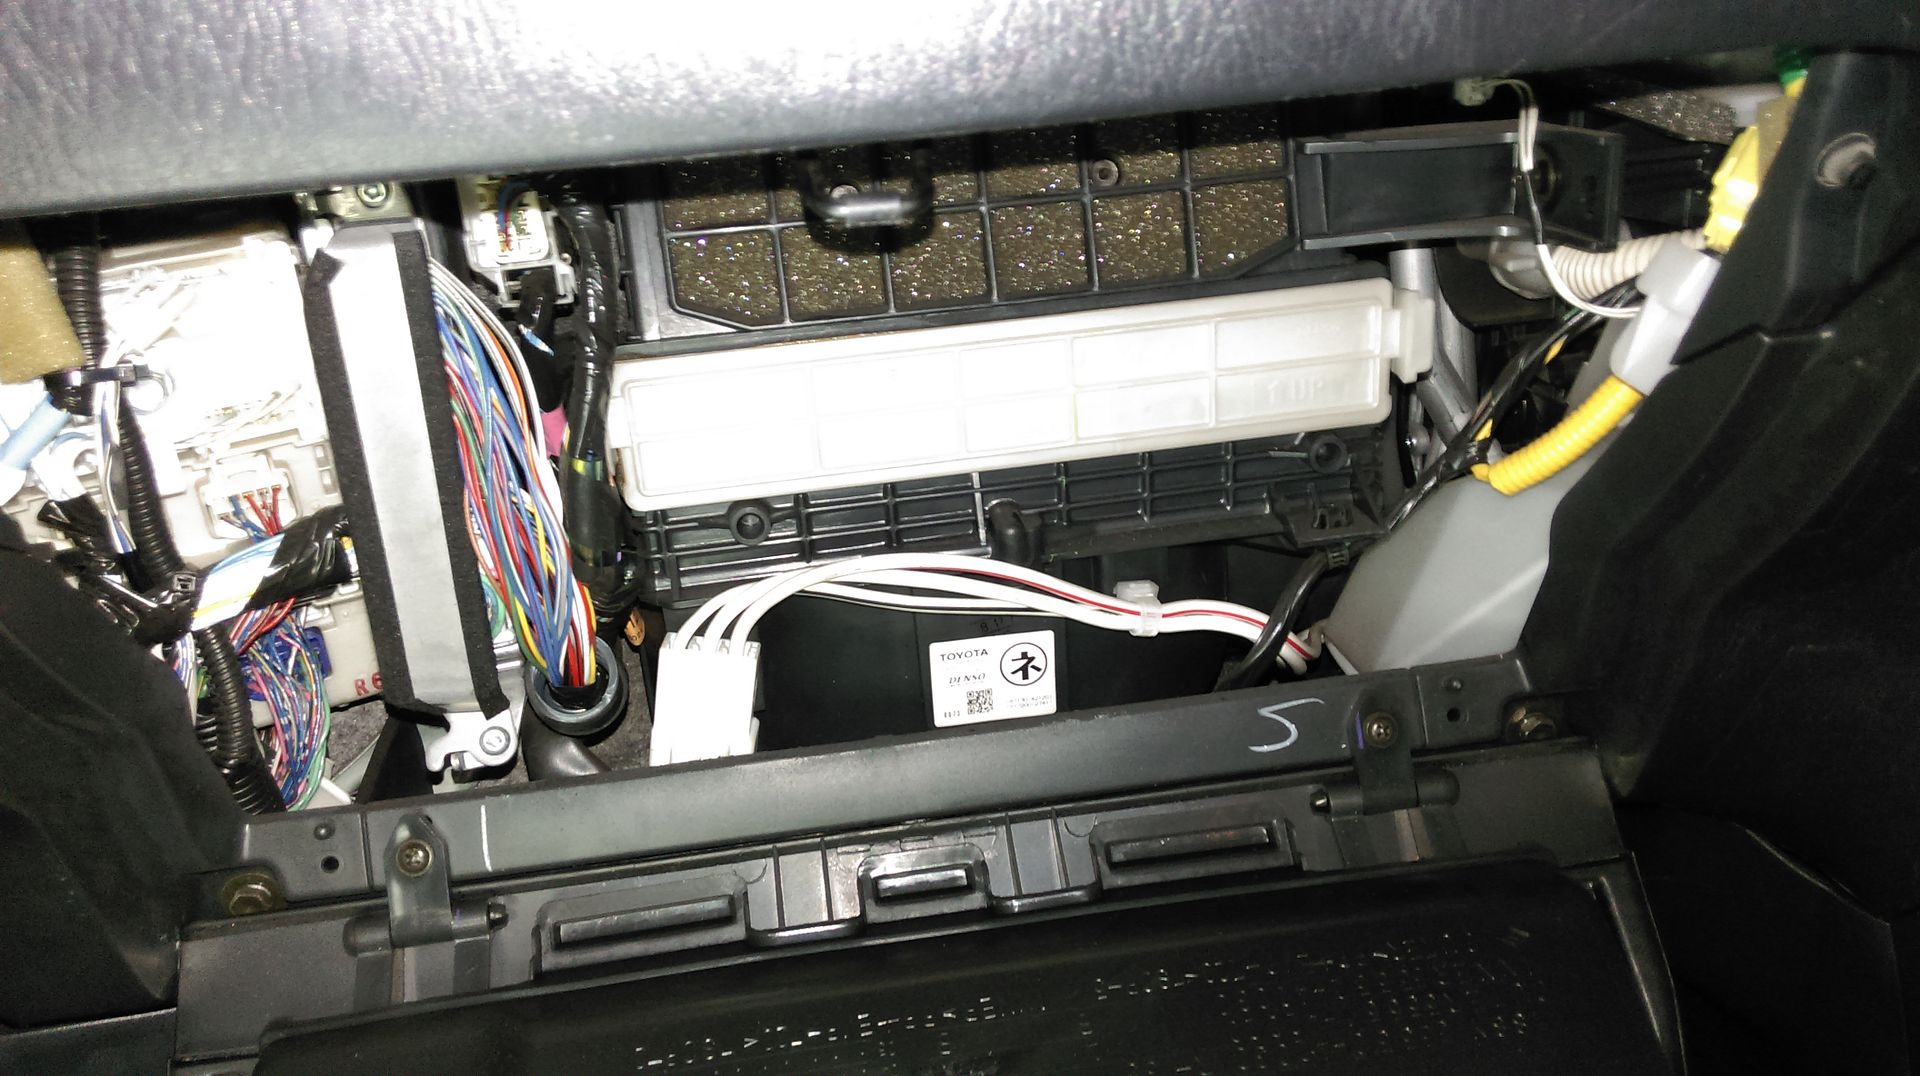
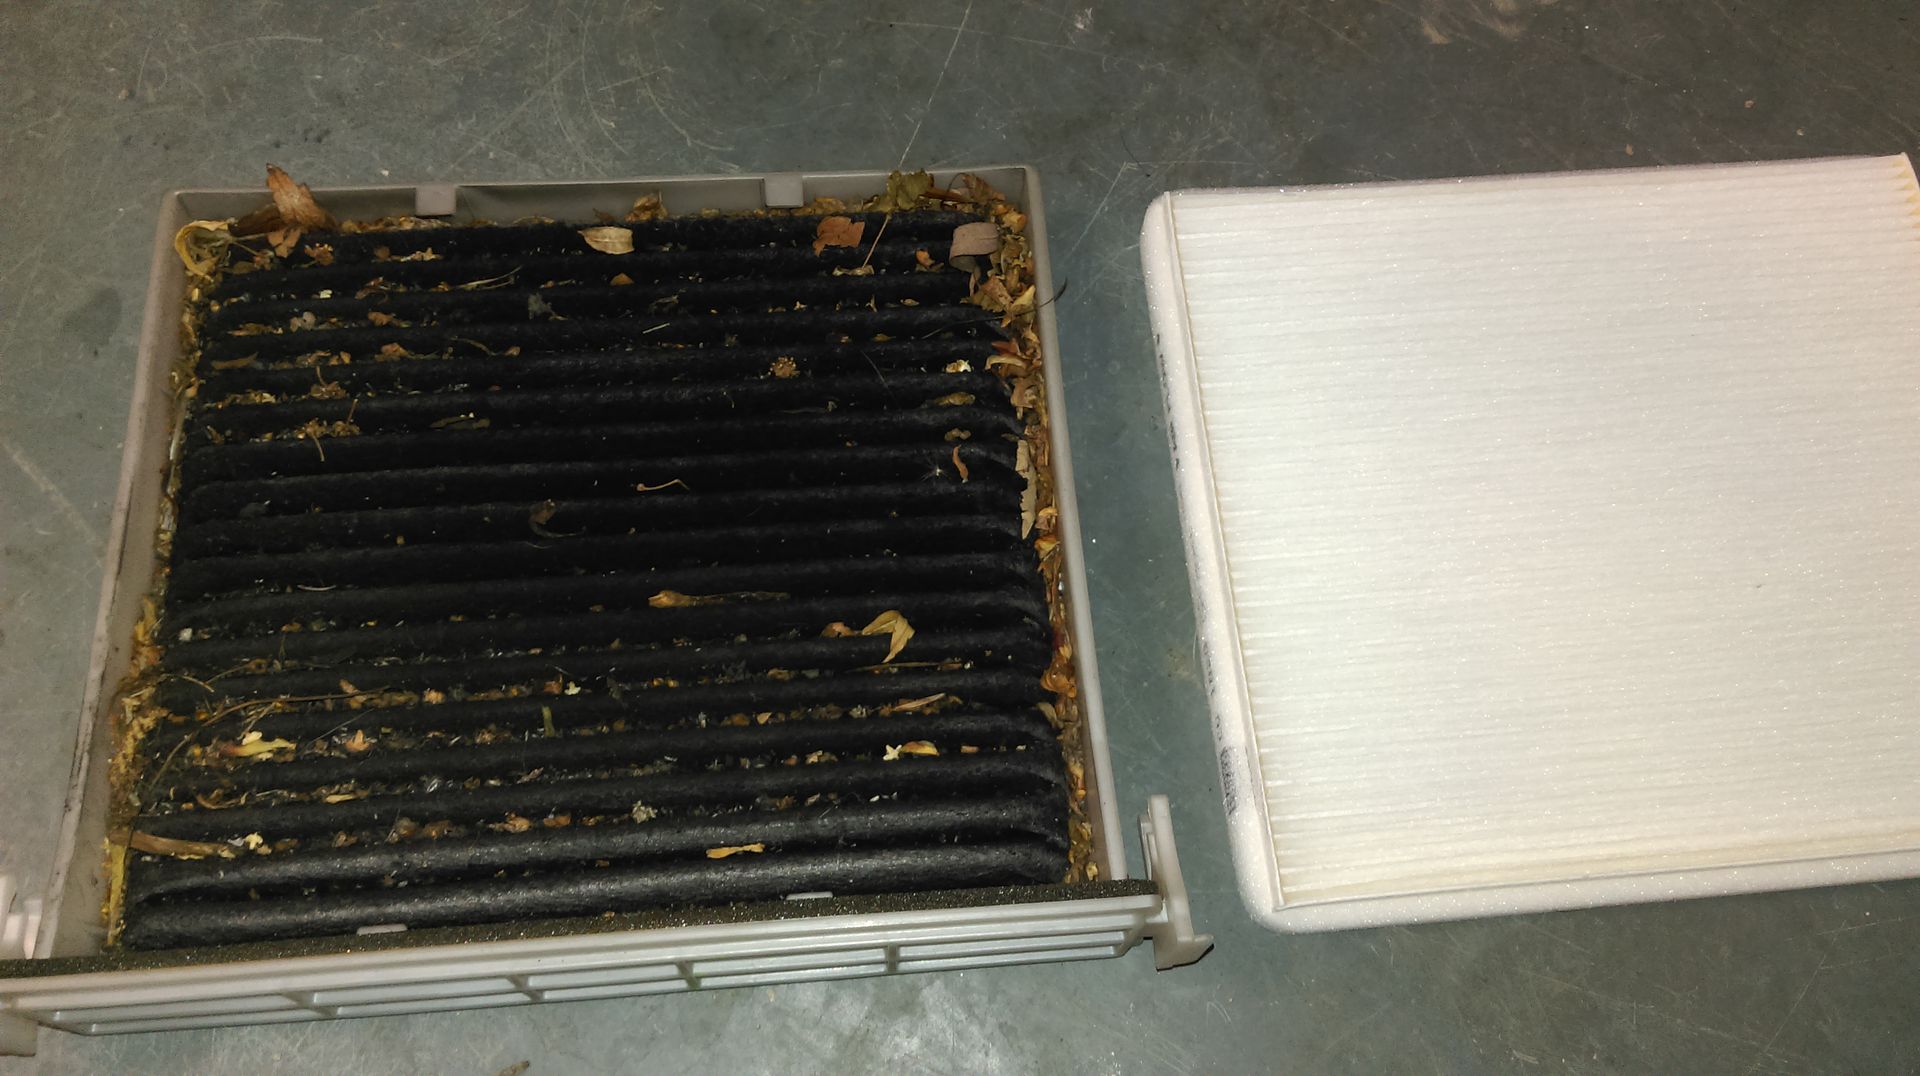
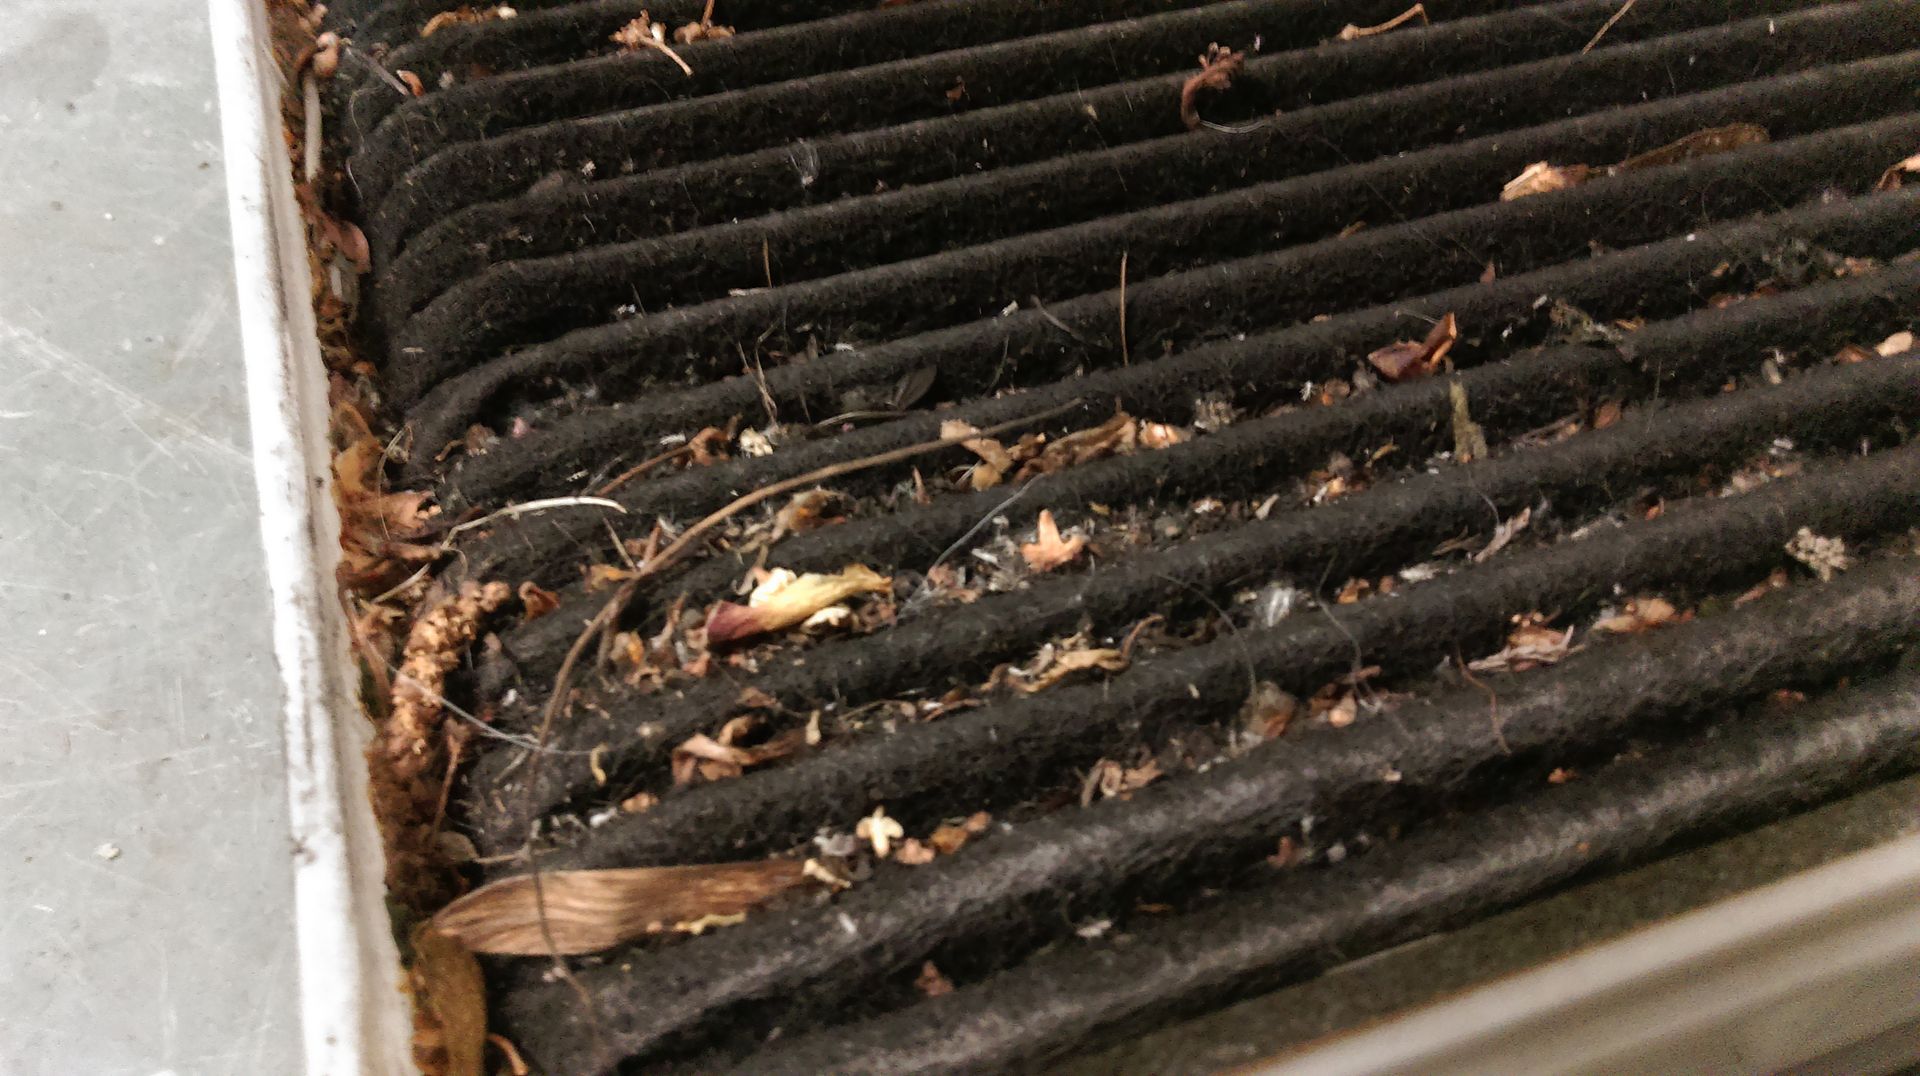
One last thing, when ordering my bits I also got a cabin filter as most regular people never change these. Just open the glove box, empty it out and then squeeze it at the sides. This will allow the glove box front to hand down and expose the white cartridge in this pic which contains the cabin filter. Pull it out, swap over the filters and re install. Saying it needed changing is an understatement.
That's it ladies and gents, happy EGR cleaning! Any feedback is much appreciated :s_cool
Tue Nov 18, 2014 8:48 pm
Disclaimer: I accept no responsibility for any damage done to persons or vehicles throught following this guide. All work is carried out at the owners risk.
Note: This is for the RAV4.2 (2000-2005) - later RAV4s will likely have a different procedure.
1. Pop the bonnet, remove the battery cover and disconnect the battery negative terminal using a 10mm spanner.

2. Locate the airbox (big black rectangular jobbie in the pic below):

3. Undo these two catches either side of the lid, disconnect the MAF sensor and then I undo the 10mm jubilee clip holding the air intake pipe in place. Remove the pipe from the airbox lid.


4. Remove the airbox by lifting it up and pulling it towards you. Remove the air filter. Now remove the three 10mm bolts holding the bottom of the airbox in place then remove the airbox:

5. You can now see the EGR valve to the left of where the airbox was. It's easy to spot as it has a black multi plug on the top and two small coolant pipes attached:

6. Undo the multiplug, and slacken off the two 12mm nuts on the top sides and the single bottom 12mm bolt.

7. Squeeze the clips on the two coolant pipes and slide them down the pipes out of the way. You may need to use some pliers. Before pulling off the coolant pipes, have a couple of small 8mm bolts to shove in the pipes to stop too much coolant spurting out. Now pull off the pipes one at time, block the ends with the bolts then remove the 12mm nuts and bolt holding the EGR in place. Remove the EGR but make sure you don't lose the metal gasket that sits behind it. Once cleaned this can be reused.

8.With the EGR on the bench, notice the three 8mm bolts at the top. These will need to be removed so you can manually operate the valve during cleaning. BEFORE removing the bolts, Mark the side of the EGR so you know what orientation to reassemble the two parts.


9. It's hard to see in this pic but it was heavily coked up inside.

10. Now get to work with some small bottle brushes and a can of EGR cleaner or carb cleaner which is half the price. I decided to use JLM EGR cleaner which is about £11 but does a good job.


11. Here is a pic of just some of the black carbon sludge that came out during cleaning.

12. Much cleaner after 20 minutes of scrubbing.

13. Give the spring on top of the EGR a spray with WD40 and work the spring up and down to ensure it moves freely. Now reassemble the two parts of the EGR and refit to the engine, don't forget the gasket. Reconnect coolant pipes and the spring clips. Give the EGR multiplug a good spray with electrical contact cleaner and let it air dry, then reconnect.
14. Whilst in that area I fit a new air filter as the old one was very dirty. Plus the new one was half as fat which should improve air flow.


15. I also decided to clean the MAF sensor using electrical contact cleaner. You can see the fine wires in the end of the sensor. Don't be tempted to rub them with anything, just give them a good blast with the spray and let it air dry.


Refit once dry, also give the multiplug a spray and let that air dry before reconnecting everything. I also replaced the fuel filter but there is already a very good guide on here showing how to do that. Last job is to reconnect the battery negative terminal once you have reinstalled everything in reverse order.
One last thing, when ordering my bits I also got a cabin filter as most regular people never change these. Just open the glove box, empty it out and then squeeze it at the sides. This will allow the glove box front to hand down and expose the white cartridge in this pic which contains the cabin filter. Pull it out, swap over the filters and re install. Saying it needed changing is an understatement.


That's it ladies and gents, happy EGR cleaning! Any feedback is much appreciated :s_cool

