Post by Hoovie on Feb 8, 2018 12:05:21 GMT
Fri Dec 13, 2013 4:13 pm #1
shcm
This installation refers to 4.3 XT5 and T180 models fitted with the "B9004" full screen Sat Nav head unit. These are vehicles from start of production to at least present date (Nov 2007) and probably beyond.
Background
The B9004 has the capability to display the image from a rear view camera or any other PAL/NTSC video source. The XT5 and T180 models also have the camera harness wiring already installed from the head unit to the inside of the rear door.
There are six signals to/from the head unit which are involved. The six signals at the rear connectors of the head unit are:
BTCY : back door courtesy switch on pin 1 of 24 way head unit connector E54 (light green wire)
REV : reverse gear select on pin 5 of 5 way head unit connector E57 (red wire)
CGND : camera supply ground on pin 21 of E54 (red wire)
V+ : camera video signal on pin 22 of E54 (white wire)
V- : camera video signal gnd on pin 23 of E54 (a screen/braid wire)
CA+ : camera positive supply on pin 24 of E54 (a black wire)
More importantly, four of these signals appear on a connector called S7 inside the rear door. The S7 connector is shown below:

S7 is a 6 way connector. Those signals that connect to S7 from the head unit are:
CGND : connects to CGND on S7 (pin 3)
V+ : connects to CV+ on S7 (pin 2)
V- : connects to CV- on S7 (pin 1)
CA+ : connects to CB+ on S7 (pin 4)
pins 5 and 6 on S7 are unused. The Toyota part number for S7 is 90980-12382. So far we have not managed to source the other mating half of the S7 connector, so alternative connectors have been home-made (see installs below).
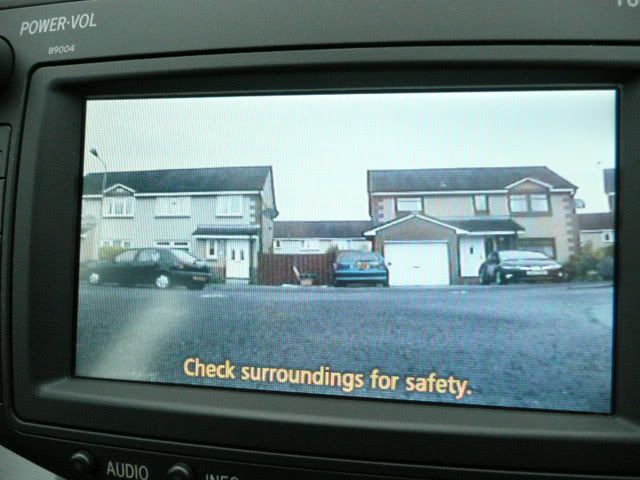
When reverse gear selection is detected via REV, 6 Volts is supplied from the head unit to the camera via CA+ (CB+) and CGND. The camera video signal is input to the head unit via V+ and V-. If the back door is detected open via BTCY, then if reverse is also selected at the time, a door open message is displayed on the head unit in place of the camera video signal.
For a non-Toyota after-market camera, it is likely to require a 12V supply and not the 6V supply that the Toyota camera would appear to accept. A suggested place to pick up the 12V is from the reversing light supply (see Darkside's installation below). V- should also be connected to CGND.
Although the B9004 unit appears to accept both a NTSC and PAL video input, a NTSC camera is recommended. Don't forget you might also want a reversed image camera and one that works in low light conditions or has infra red LEDs for night time use.
OK, that's enough theory, what you really want is the installation. The following is JHRC's installation into a XT5.
JHRC's XT5 Install
I cut some circuit board that you can buy from Maplin, the pin I got from a burnt out interface unit from my work, but I am sure you can buy them from Maplin, the video cable came from accessories that come with your home DVD player, solder the pins onto circuit board cut one of the plugs of the video cable and bare back the cable, solder to the circuit board. I then used rubber sleeves to insulate the plug.
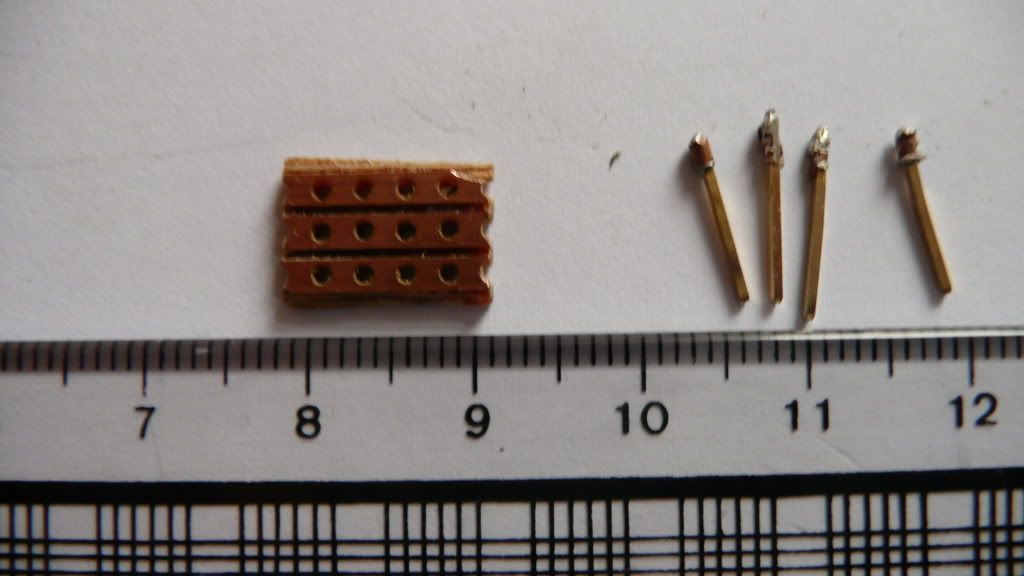
I used 6 pins but you only need 4, I haven't mentioned what position you solder the wire to, as shcm already covered this.
Connect the plug to S7 socket secure video cable and feed it down to the wiring that comes into rear door, right hand corner, push video plug through flexible rubber into where right hand light cluster is, this has an access cover for changing bulbs.
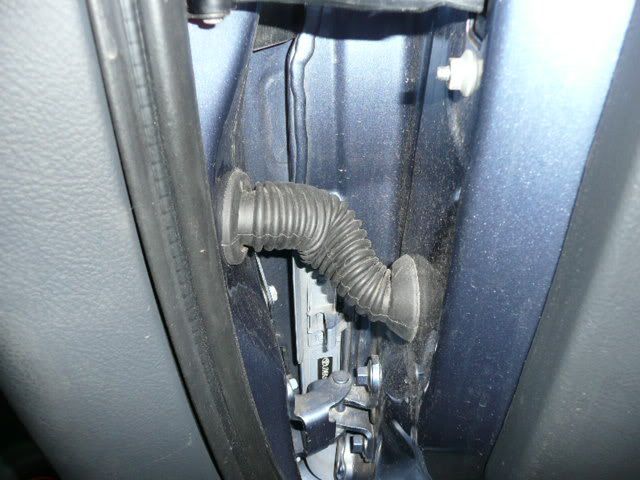
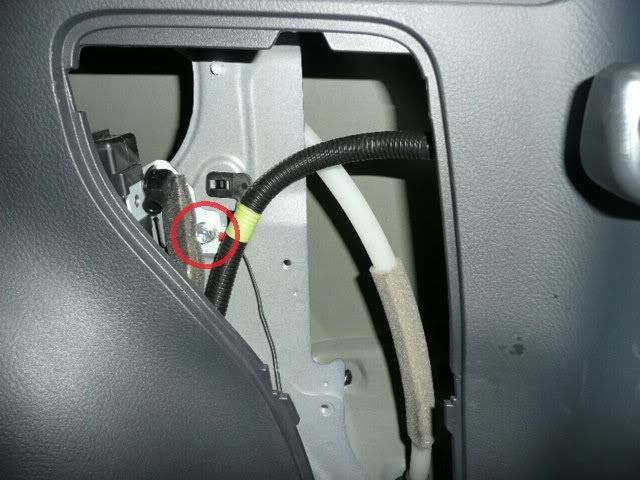
My 12v supply come presently from the rear accessories socket, but will try to take this from reversing lights, earth is bolted to body using a 6mm eye crimp.
Now the camera I bought various ones CMOS and CCD sensors, PAL or NTSC from Ebay, but ended up using a NTSC camera with a Sharp 1/3 CCD image sensor from Ebay (Backupeyes from Baldwin Education) this a UK company with very fast delivery, Prices approx. £40,
Rear view CCD camera, night vision reversing camera, (#330182485033)
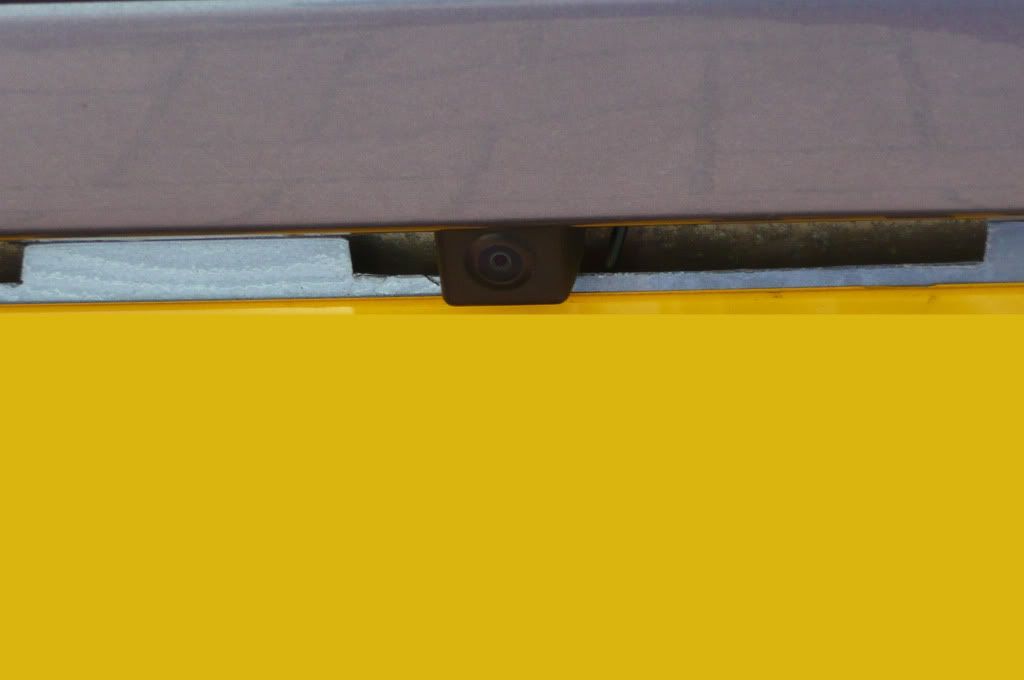
This was fitted below the bumper on right hand side of number plate, 2 X 4mm hole were drilled into bumper to secure camera bracket and the camera cable was fed behind bumper to the right and tied to existing cables. On the right hand corner below bumper above exhaust tail pipe there is a vent flap which you feed the cable into and comes in near light cluster, this is where to connect the video and power cable.
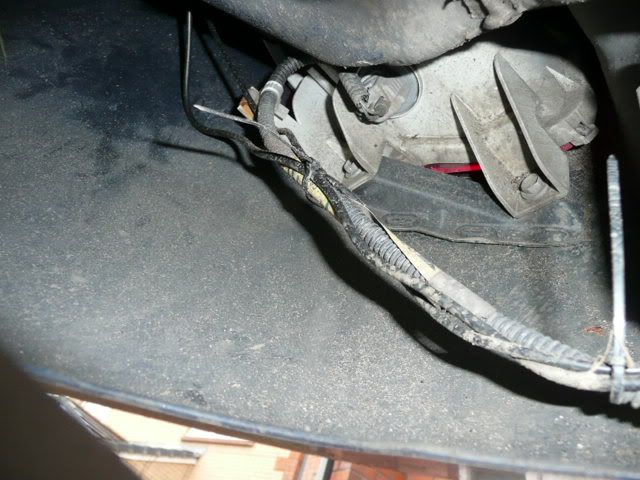
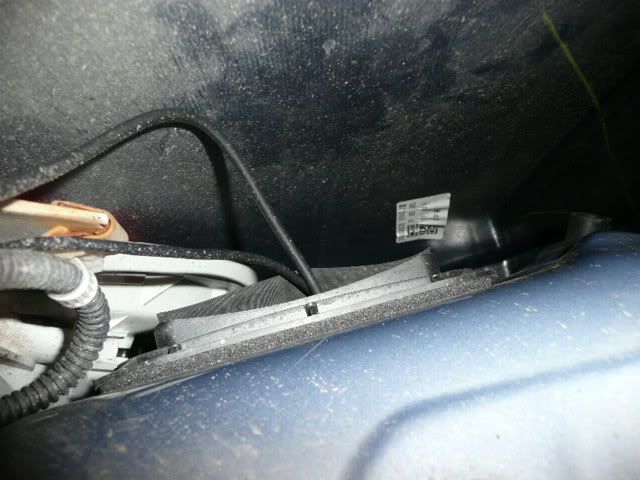
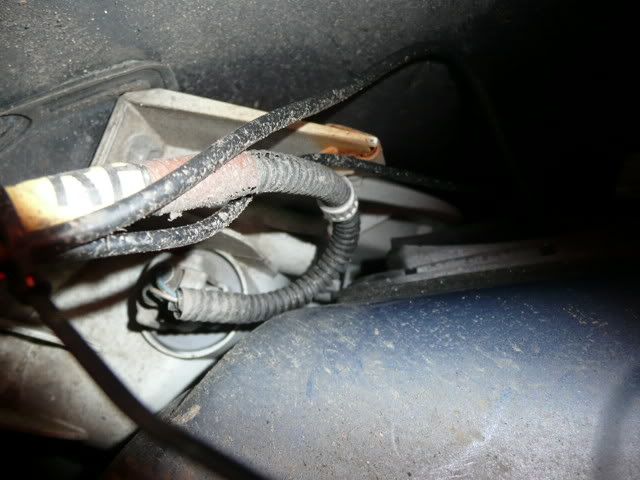
This is for XT5, the t180 could use a different camera and fit into the rear door where it was designed for near your number plate.
I was behind a Lexus RX300 and it had a very small and discreet rear view camera fitted at the number plate, which would probably be ideal for T180.
If anyone requires any more help I can make some more plugs and send to them without a cable.
Jim.
Darkside's T180 Install
Here goes then, to any T180 owners mad as hell (like me) that Toyota did not fit a camera from the off.
For T180 owners, I bought a camera off ebay. They are easily found.
The info by Schm & JHRC further up show the connections to the camera connector.
Below is where I positioned the camera on the back door:

and close up:

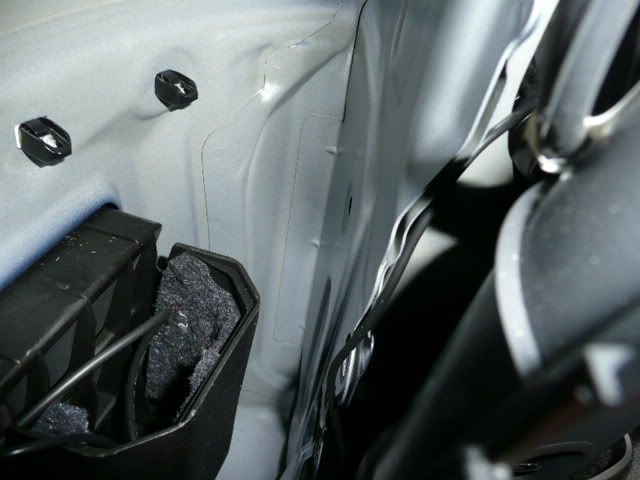
In order to fit where shown you have to remove that trim/numberplate light housing from the rear door. This is done by removing the three nuts on the inside of the rear door panel. This picture shows two of the the said blighters:

Then you need to drill and fix the camera:

Run the power and video through the back door (existing grommet for number plate light cable) - stanley knife and patience! you can see the access point in the bolt picture above.
Then connect up the camera wire (see JHRC) I ran the power cable along the existing harness through the rear door and through the flexible connector (JHRC again)
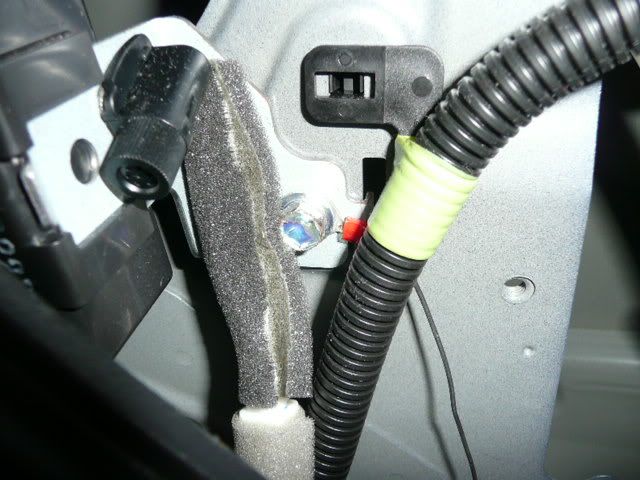
Once through into the access panel earth the cable as shown below. The power needs to be tapped in to the reverse light. In the harness in front of you are a number of wires. There are two red wires-one is the reverse light circuit, one permanent live. Use a tester (and a helper to put the car in & out of reverse) to locate the correct one. Connect in with a scotchlok, after I took the picture below I ran the cable into the harness to finish off the job.

and that is it, T180 as it should have been from day one!!
shcm's Update Notes Dec 2013
The above almost certainly also applies to the later B9017 unit fitted to later RAVs.
Note for vehicles fitted with touch and go units, these do take cameras. If using a 12V camera, note it is now detected differently by some T&G units. The camera power supply needs to be connected to the camera when the vehicle is powered up. This means you can no longer just power the camera from the reversing light feed (unless you start the vehicle with reverse gear selected). Some options are:
Final Note
Of course, you install at your own risk, but shcm, JHRC and Darkside wish you a successful install. Enjoy!
shcm
This installation refers to 4.3 XT5 and T180 models fitted with the "B9004" full screen Sat Nav head unit. These are vehicles from start of production to at least present date (Nov 2007) and probably beyond.
Background
The B9004 has the capability to display the image from a rear view camera or any other PAL/NTSC video source. The XT5 and T180 models also have the camera harness wiring already installed from the head unit to the inside of the rear door.
There are six signals to/from the head unit which are involved. The six signals at the rear connectors of the head unit are:
BTCY : back door courtesy switch on pin 1 of 24 way head unit connector E54 (light green wire)
REV : reverse gear select on pin 5 of 5 way head unit connector E57 (red wire)
CGND : camera supply ground on pin 21 of E54 (red wire)
V+ : camera video signal on pin 22 of E54 (white wire)
V- : camera video signal gnd on pin 23 of E54 (a screen/braid wire)
CA+ : camera positive supply on pin 24 of E54 (a black wire)
More importantly, four of these signals appear on a connector called S7 inside the rear door. The S7 connector is shown below:

S7 is a 6 way connector. Those signals that connect to S7 from the head unit are:
CGND : connects to CGND on S7 (pin 3)
V+ : connects to CV+ on S7 (pin 2)
V- : connects to CV- on S7 (pin 1)
CA+ : connects to CB+ on S7 (pin 4)
pins 5 and 6 on S7 are unused. The Toyota part number for S7 is 90980-12382. So far we have not managed to source the other mating half of the S7 connector, so alternative connectors have been home-made (see installs below).
When reverse gear selection is detected via REV, 6 Volts is supplied from the head unit to the camera via CA+ (CB+) and CGND. The camera video signal is input to the head unit via V+ and V-. If the back door is detected open via BTCY, then if reverse is also selected at the time, a door open message is displayed on the head unit in place of the camera video signal.
For a non-Toyota after-market camera, it is likely to require a 12V supply and not the 6V supply that the Toyota camera would appear to accept. A suggested place to pick up the 12V is from the reversing light supply (see Darkside's installation below). V- should also be connected to CGND.
Although the B9004 unit appears to accept both a NTSC and PAL video input, a NTSC camera is recommended. Don't forget you might also want a reversed image camera and one that works in low light conditions or has infra red LEDs for night time use.
OK, that's enough theory, what you really want is the installation. The following is JHRC's installation into a XT5.
JHRC's XT5 Install
I cut some circuit board that you can buy from Maplin, the pin I got from a burnt out interface unit from my work, but I am sure you can buy them from Maplin, the video cable came from accessories that come with your home DVD player, solder the pins onto circuit board cut one of the plugs of the video cable and bare back the cable, solder to the circuit board. I then used rubber sleeves to insulate the plug.

I used 6 pins but you only need 4, I haven't mentioned what position you solder the wire to, as shcm already covered this.
Connect the plug to S7 socket secure video cable and feed it down to the wiring that comes into rear door, right hand corner, push video plug through flexible rubber into where right hand light cluster is, this has an access cover for changing bulbs.


My 12v supply come presently from the rear accessories socket, but will try to take this from reversing lights, earth is bolted to body using a 6mm eye crimp.

Now the camera I bought various ones CMOS and CCD sensors, PAL or NTSC from Ebay, but ended up using a NTSC camera with a Sharp 1/3 CCD image sensor from Ebay (Backupeyes from Baldwin Education) this a UK company with very fast delivery, Prices approx. £40,
Rear view CCD camera, night vision reversing camera, (#330182485033)

This was fitted below the bumper on right hand side of number plate, 2 X 4mm hole were drilled into bumper to secure camera bracket and the camera cable was fed behind bumper to the right and tied to existing cables. On the right hand corner below bumper above exhaust tail pipe there is a vent flap which you feed the cable into and comes in near light cluster, this is where to connect the video and power cable.


This is for XT5, the t180 could use a different camera and fit into the rear door where it was designed for near your number plate.
I was behind a Lexus RX300 and it had a very small and discreet rear view camera fitted at the number plate, which would probably be ideal for T180.
If anyone requires any more help I can make some more plugs and send to them without a cable.
Jim.
Darkside's T180 Install
Here goes then, to any T180 owners mad as hell (like me) that Toyota did not fit a camera from the off.
For T180 owners, I bought a camera off ebay. They are easily found.
The info by Schm & JHRC further up show the connections to the camera connector.
Below is where I positioned the camera on the back door:

and close up:

In order to fit where shown you have to remove that trim/numberplate light housing from the rear door. This is done by removing the three nuts on the inside of the rear door panel. This picture shows two of the the said blighters:

Then you need to drill and fix the camera:

Run the power and video through the back door (existing grommet for number plate light cable) - stanley knife and patience! you can see the access point in the bolt picture above.
Then connect up the camera wire (see JHRC) I ran the power cable along the existing harness through the rear door and through the flexible connector (JHRC again)
Once through into the access panel earth the cable as shown below. The power needs to be tapped in to the reverse light. In the harness in front of you are a number of wires. There are two red wires-one is the reverse light circuit, one permanent live. Use a tester (and a helper to put the car in & out of reverse) to locate the correct one. Connect in with a scotchlok, after I took the picture below I ran the cable into the harness to finish off the job.

and that is it, T180 as it should have been from day one!!
shcm's Update Notes Dec 2013
The above almost certainly also applies to the later B9017 unit fitted to later RAVs.
Note for vehicles fitted with touch and go units, these do take cameras. If using a 12V camera, note it is now detected differently by some T&G units. The camera power supply needs to be connected to the camera when the vehicle is powered up. This means you can no longer just power the camera from the reversing light feed (unless you start the vehicle with reverse gear selected). Some options are:
- Power the camera off an ignition feed, which means the camera is permanent powered while the car is running.
- Use a 6V camera and power it from the 6V camera supply off the back of the T&G unit, as Toyota intended. This T&G supplied 6V power supply comes up as the T&G unit starts up @ ignition, in order to detect the camera. It is then switched off after about 1 minute and will come back up again when reverse gear is selected (i.e. when the reverse gear select input to the T&G unit is active).
- Use the T&G 6V supply output to switch a relay (or use a small high-side MOSFET circuit) to feed 12V to the camera power supply.
Final Note
Of course, you install at your own risk, but shcm, JHRC and Darkside wish you a successful install. Enjoy!

